Analytics

Monday 27 November 2023

November Block

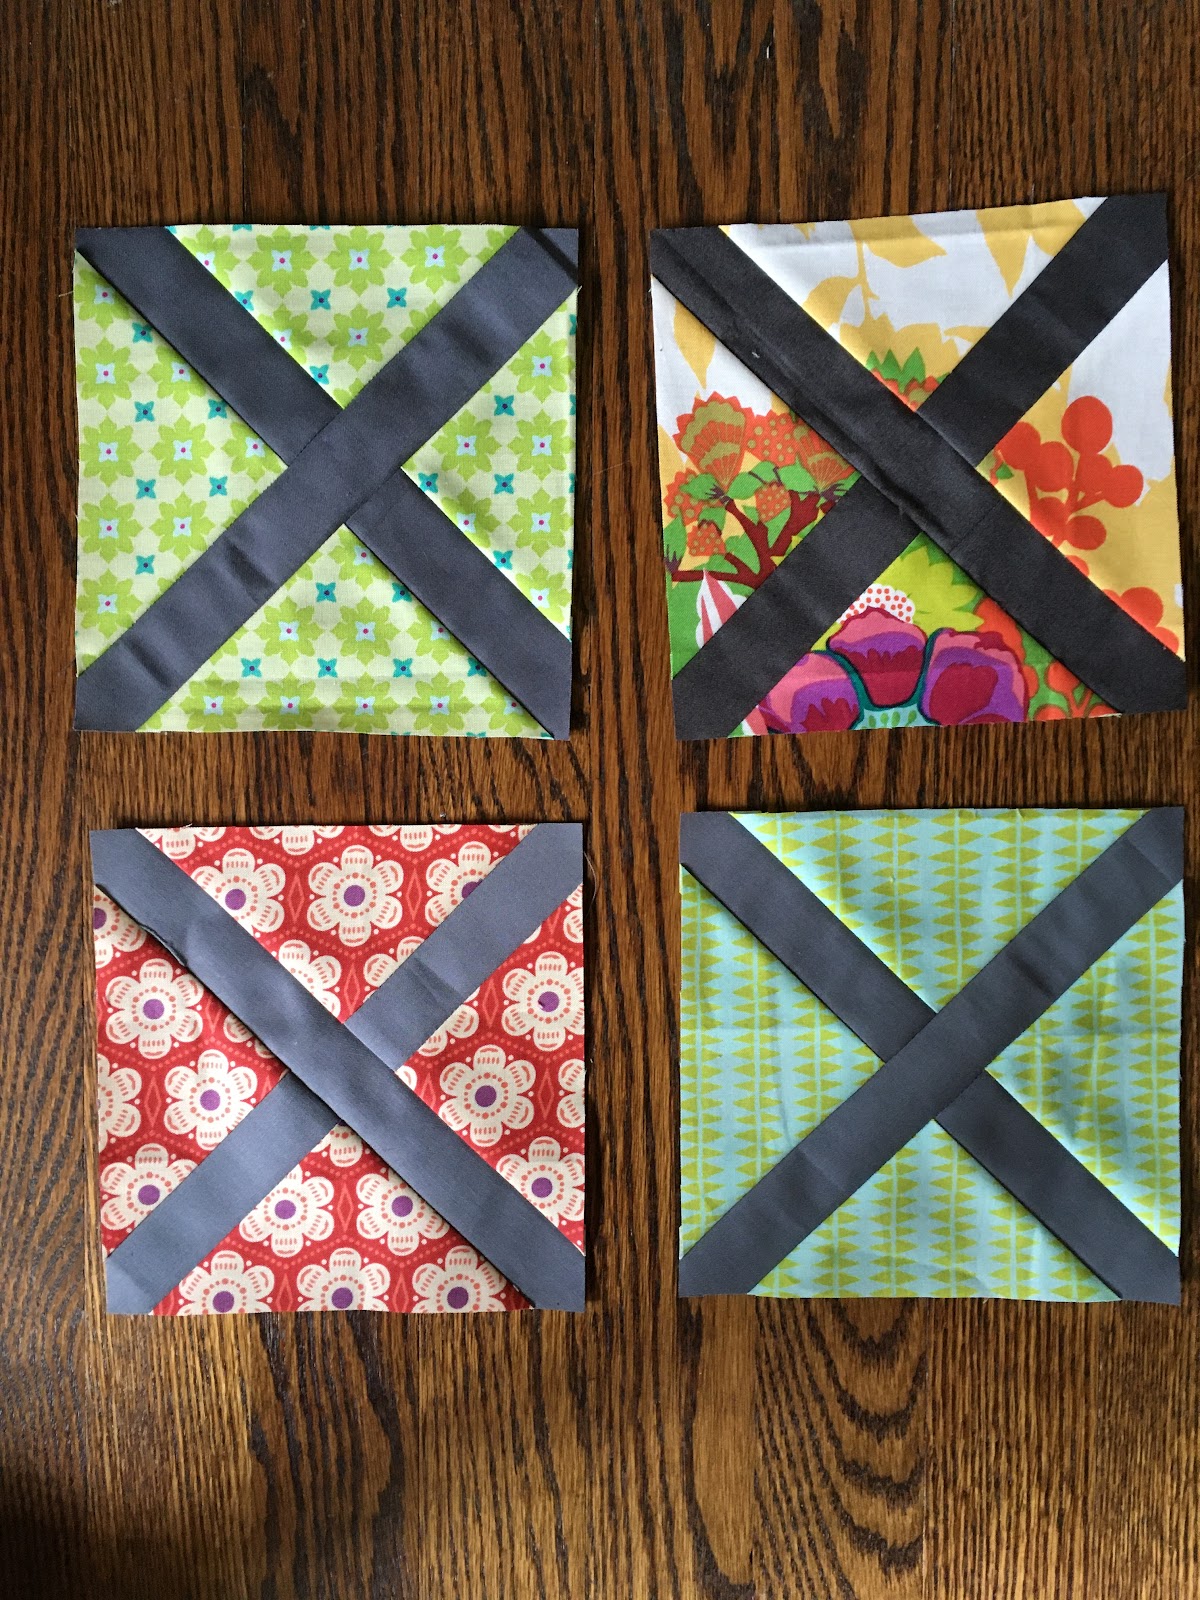
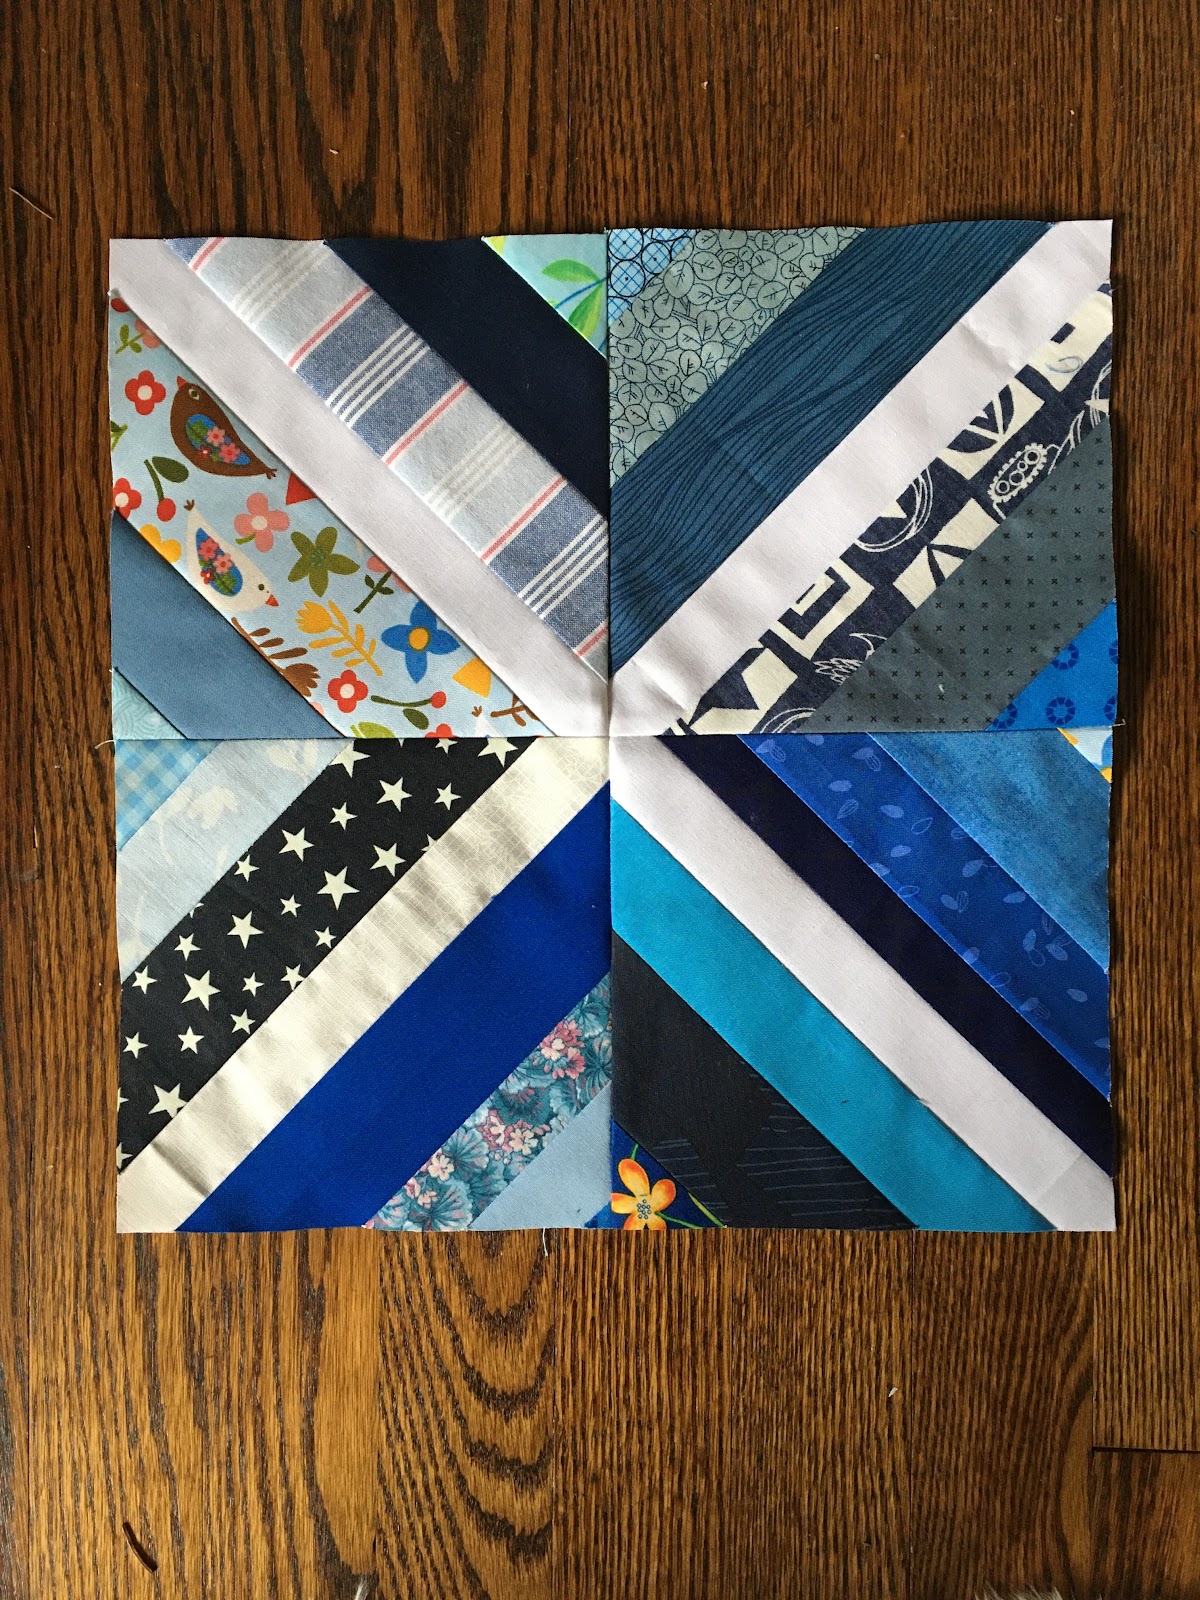
 Scrappy X String Block


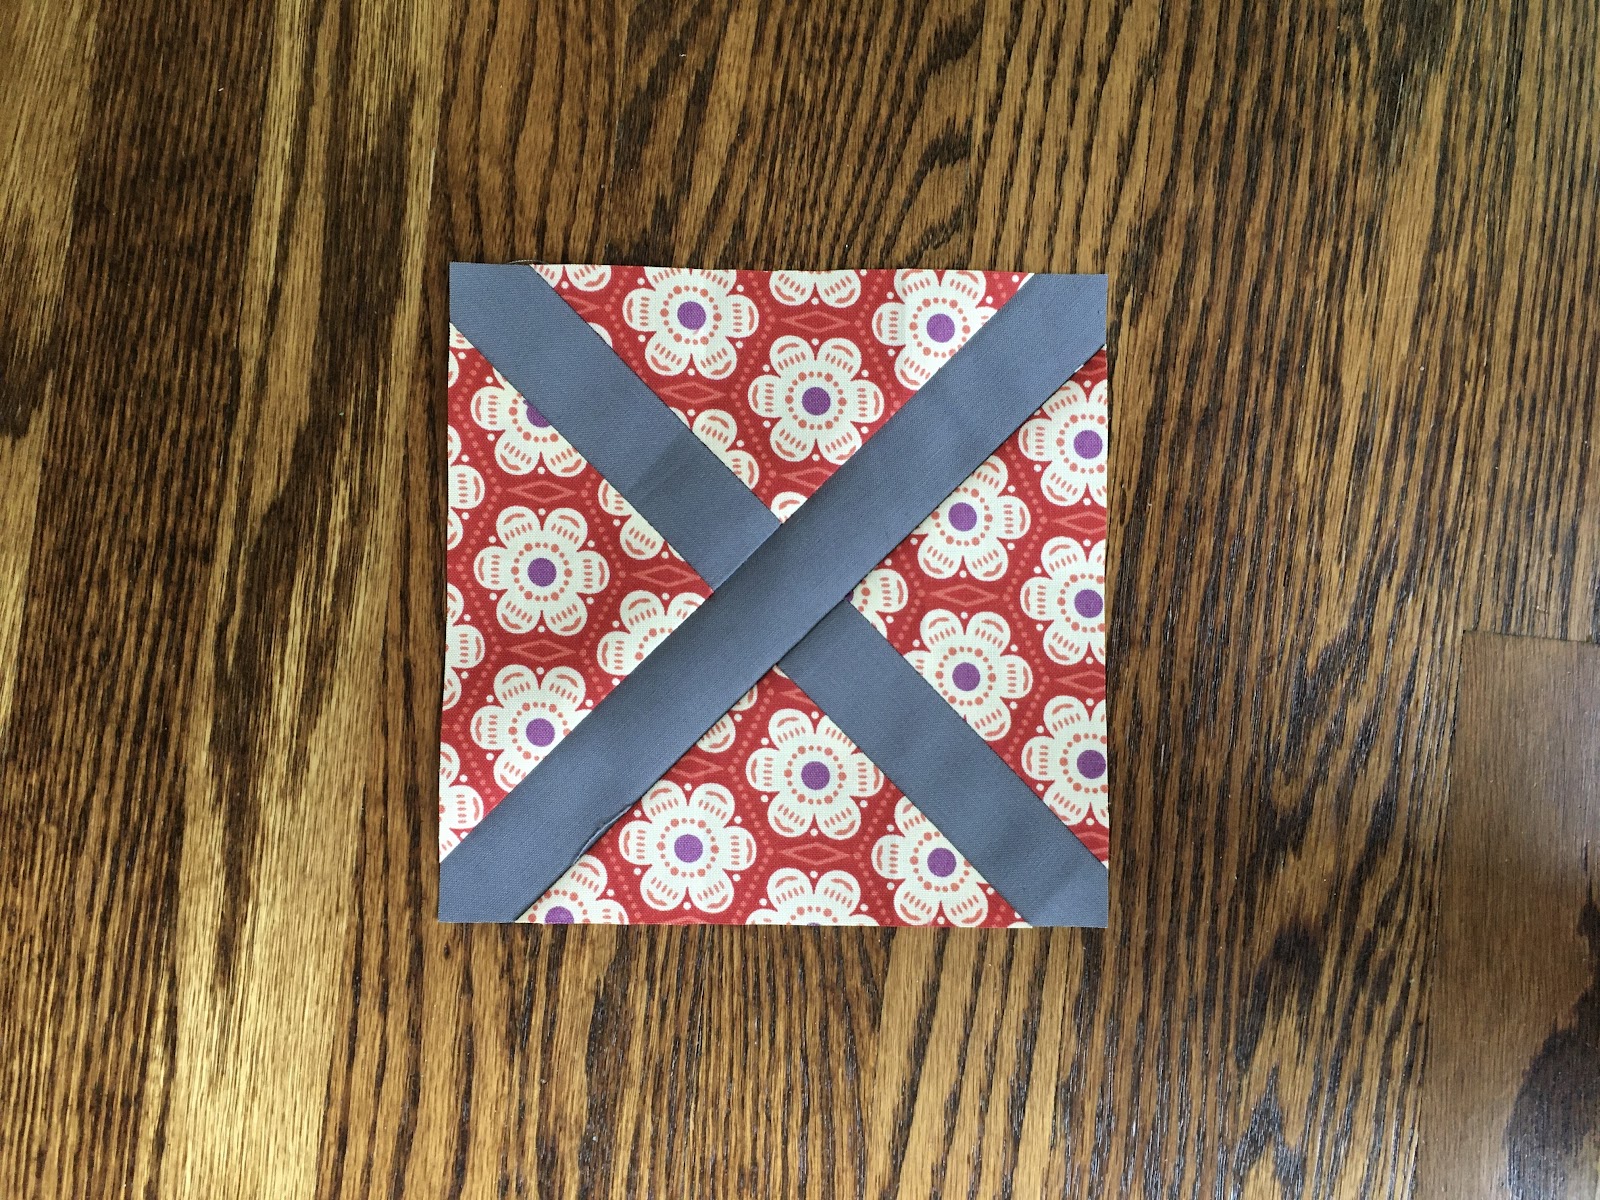
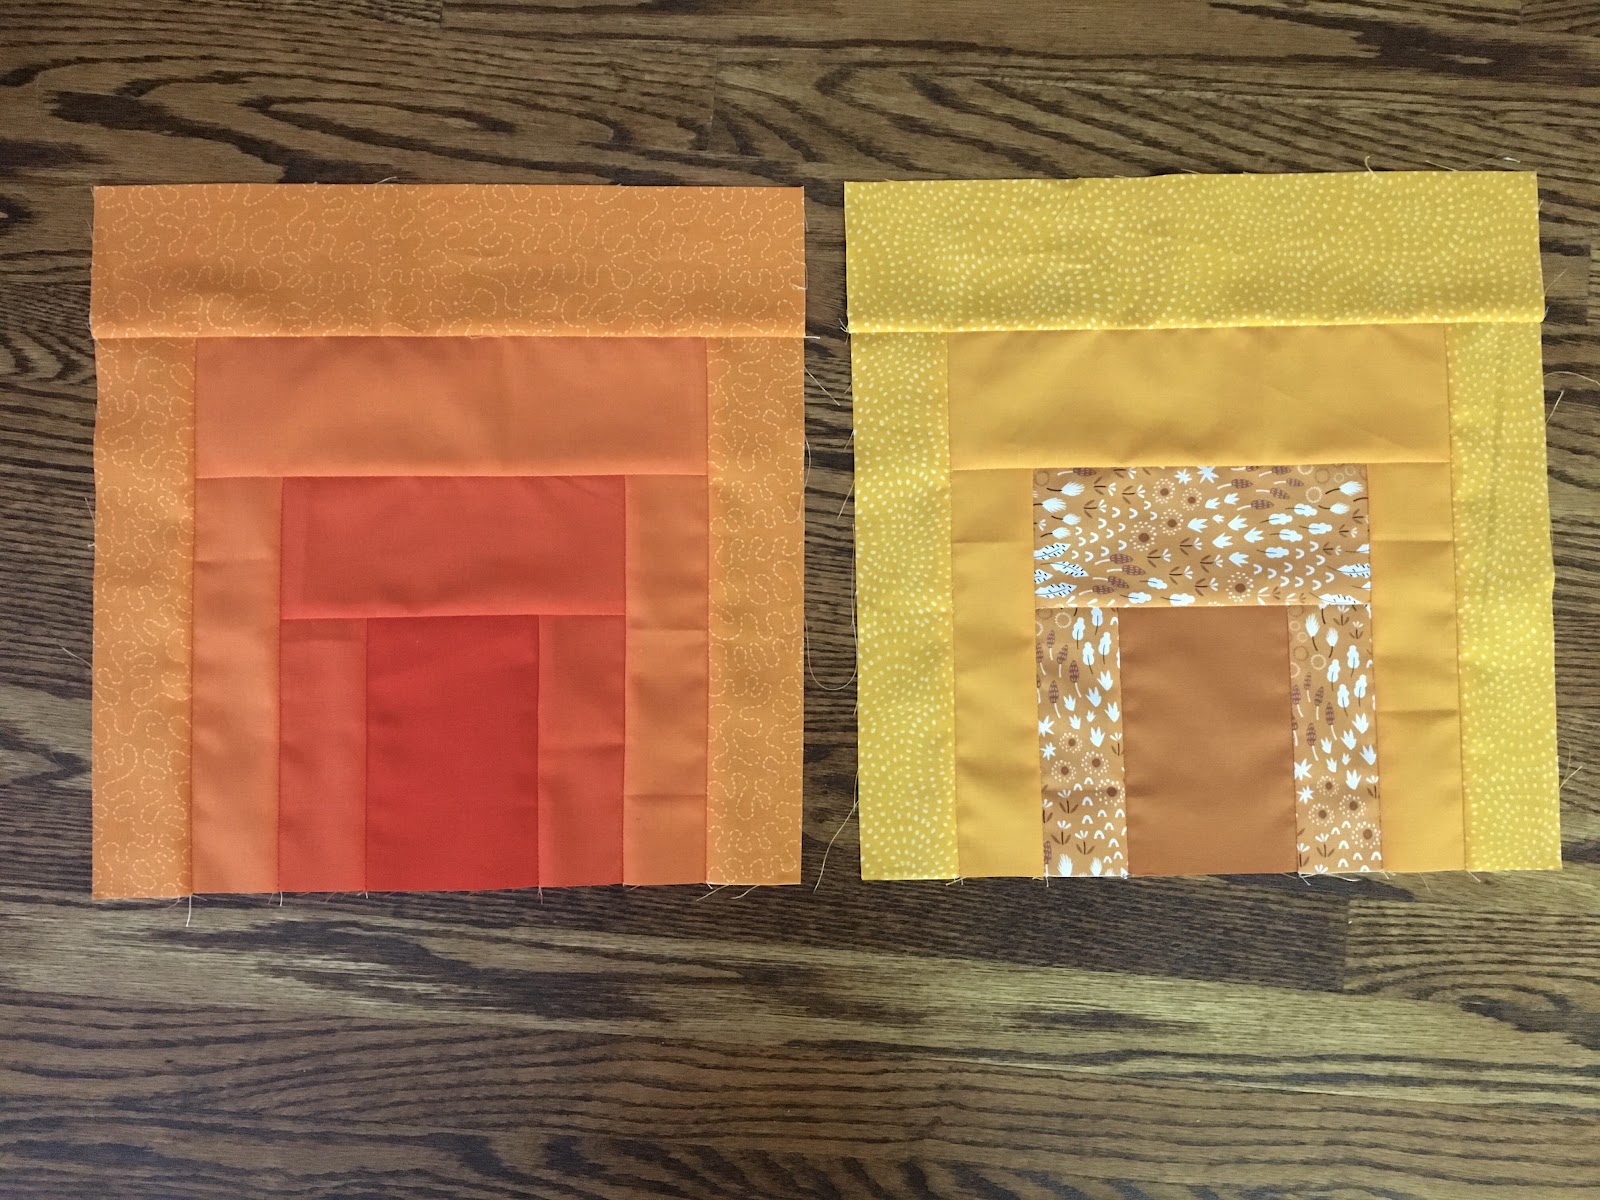
This month’s block is adapted from the String Block in “Quilt Improv” by Lucie Summers.  It is made up of four units sewn together so that the diagonals of each unit meet to form a white “X”.


For this block, you will need a cardboard square cut 6 ½” to use as a guide.
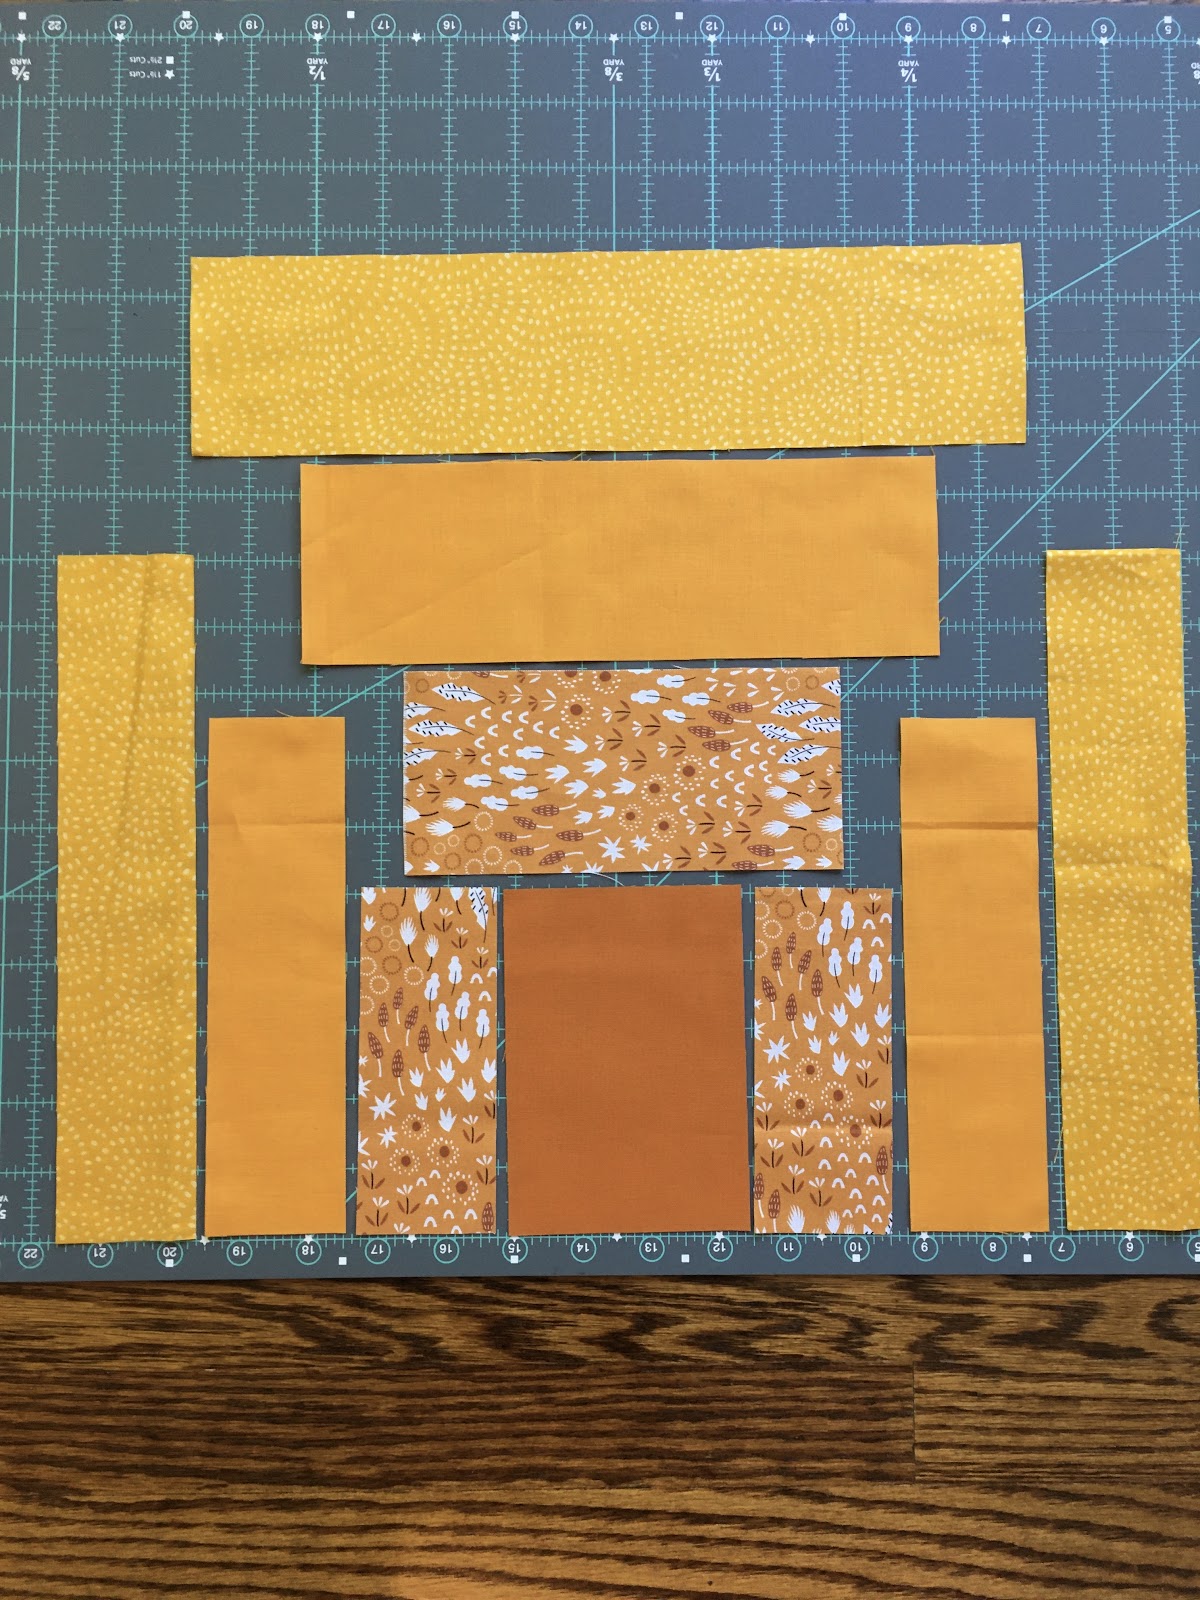

Fabric:

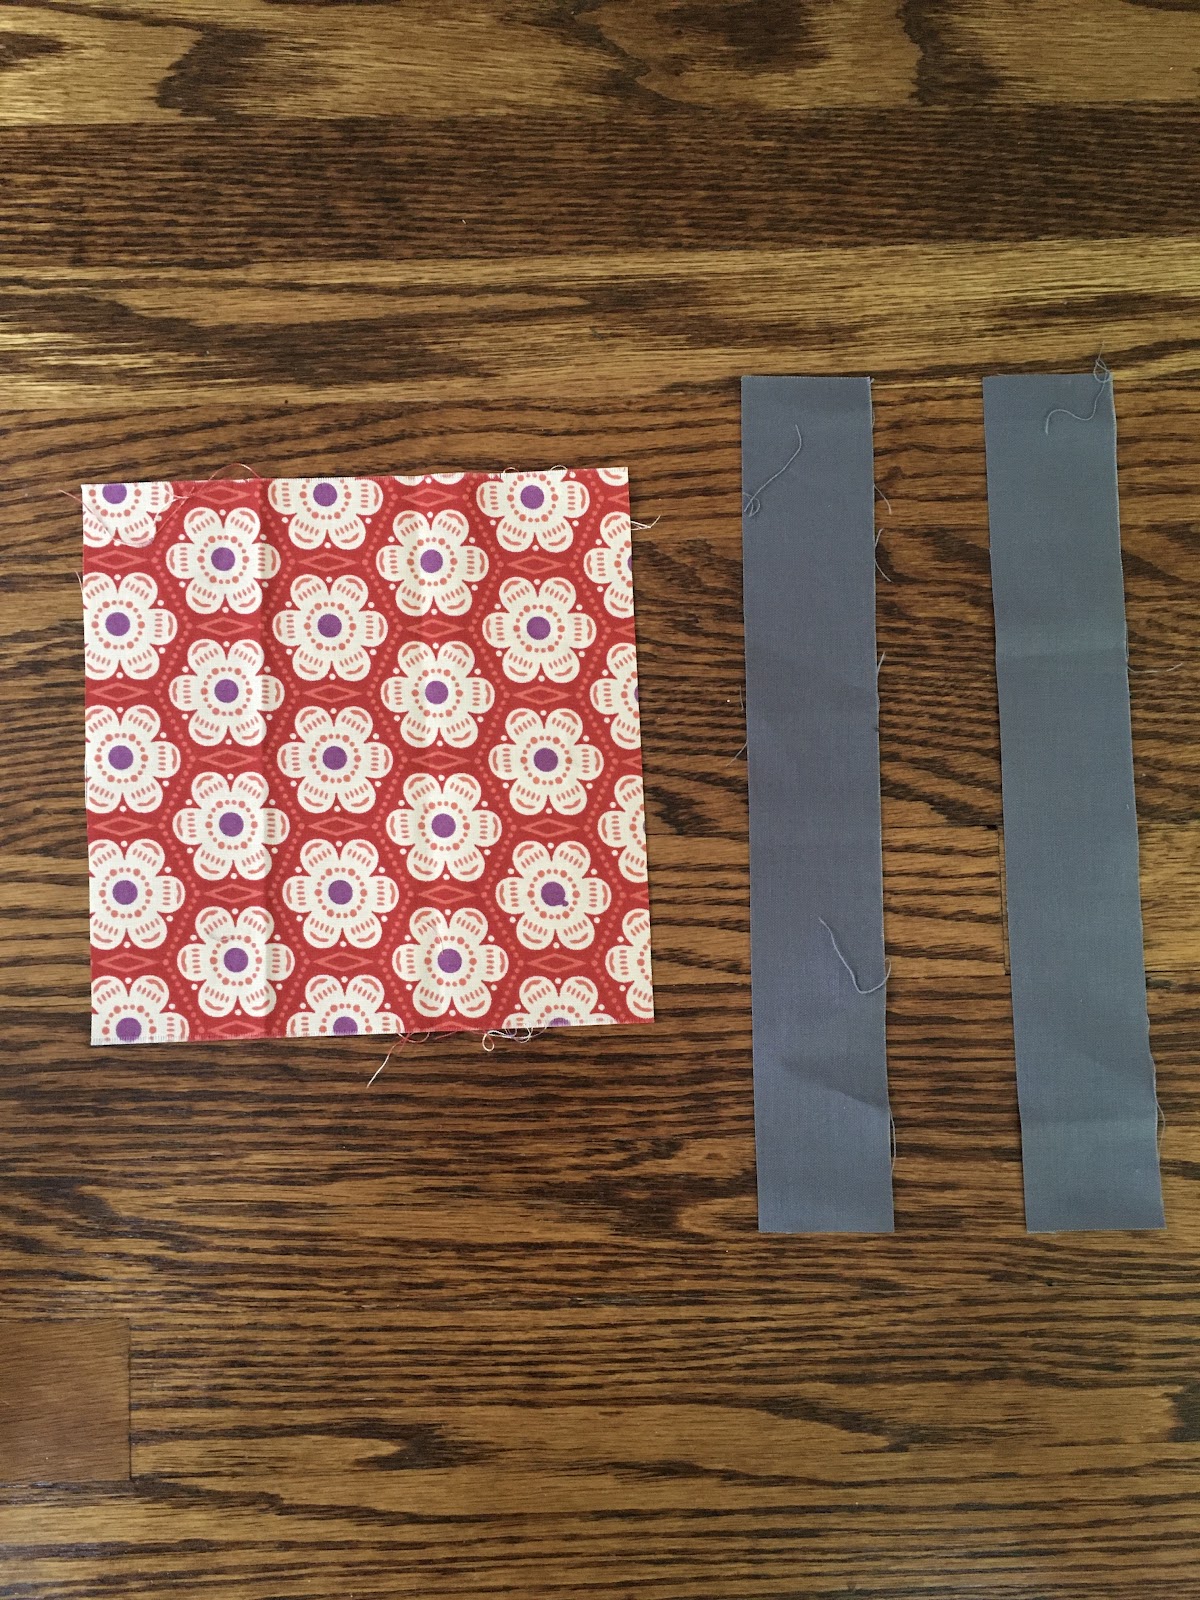
An assortment of blue strips in a variety of prints and solids, ranging in width from 1” to 2.25”.

Four 1.5” x 10” solid white strips, for the centre diagonal of each unit.
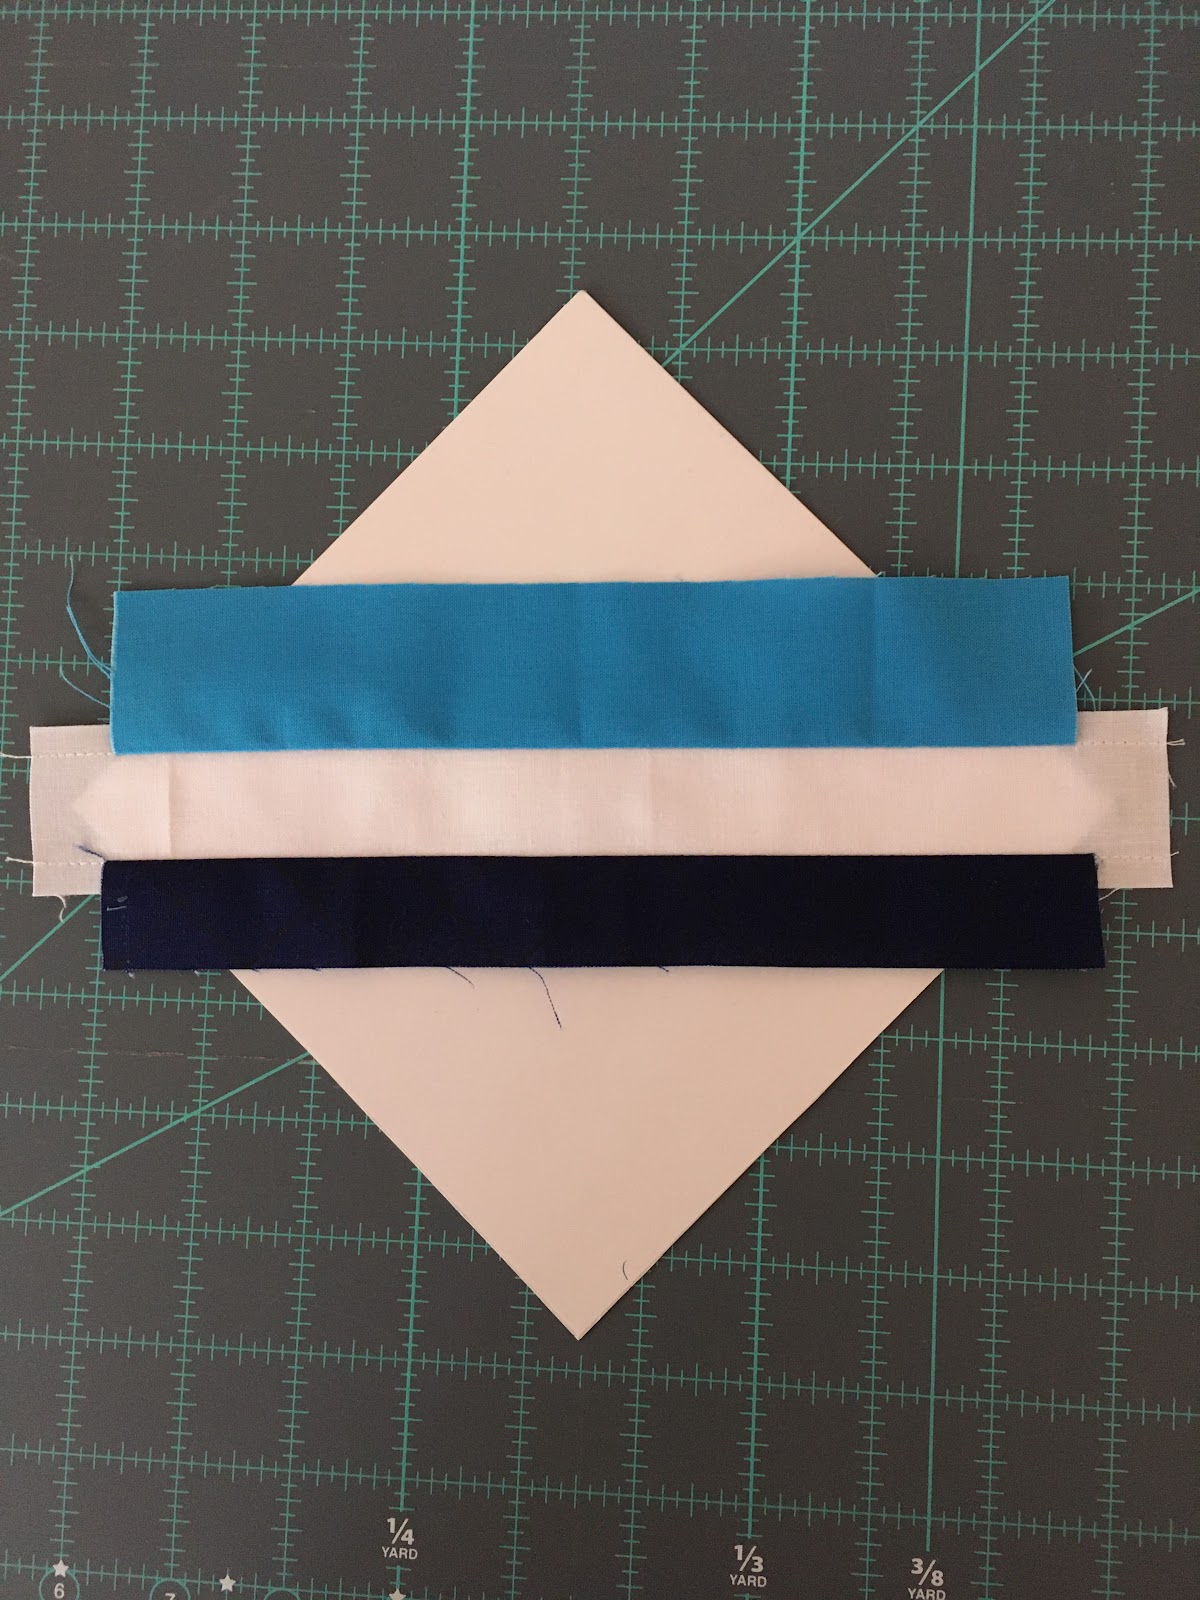

To make one unit:

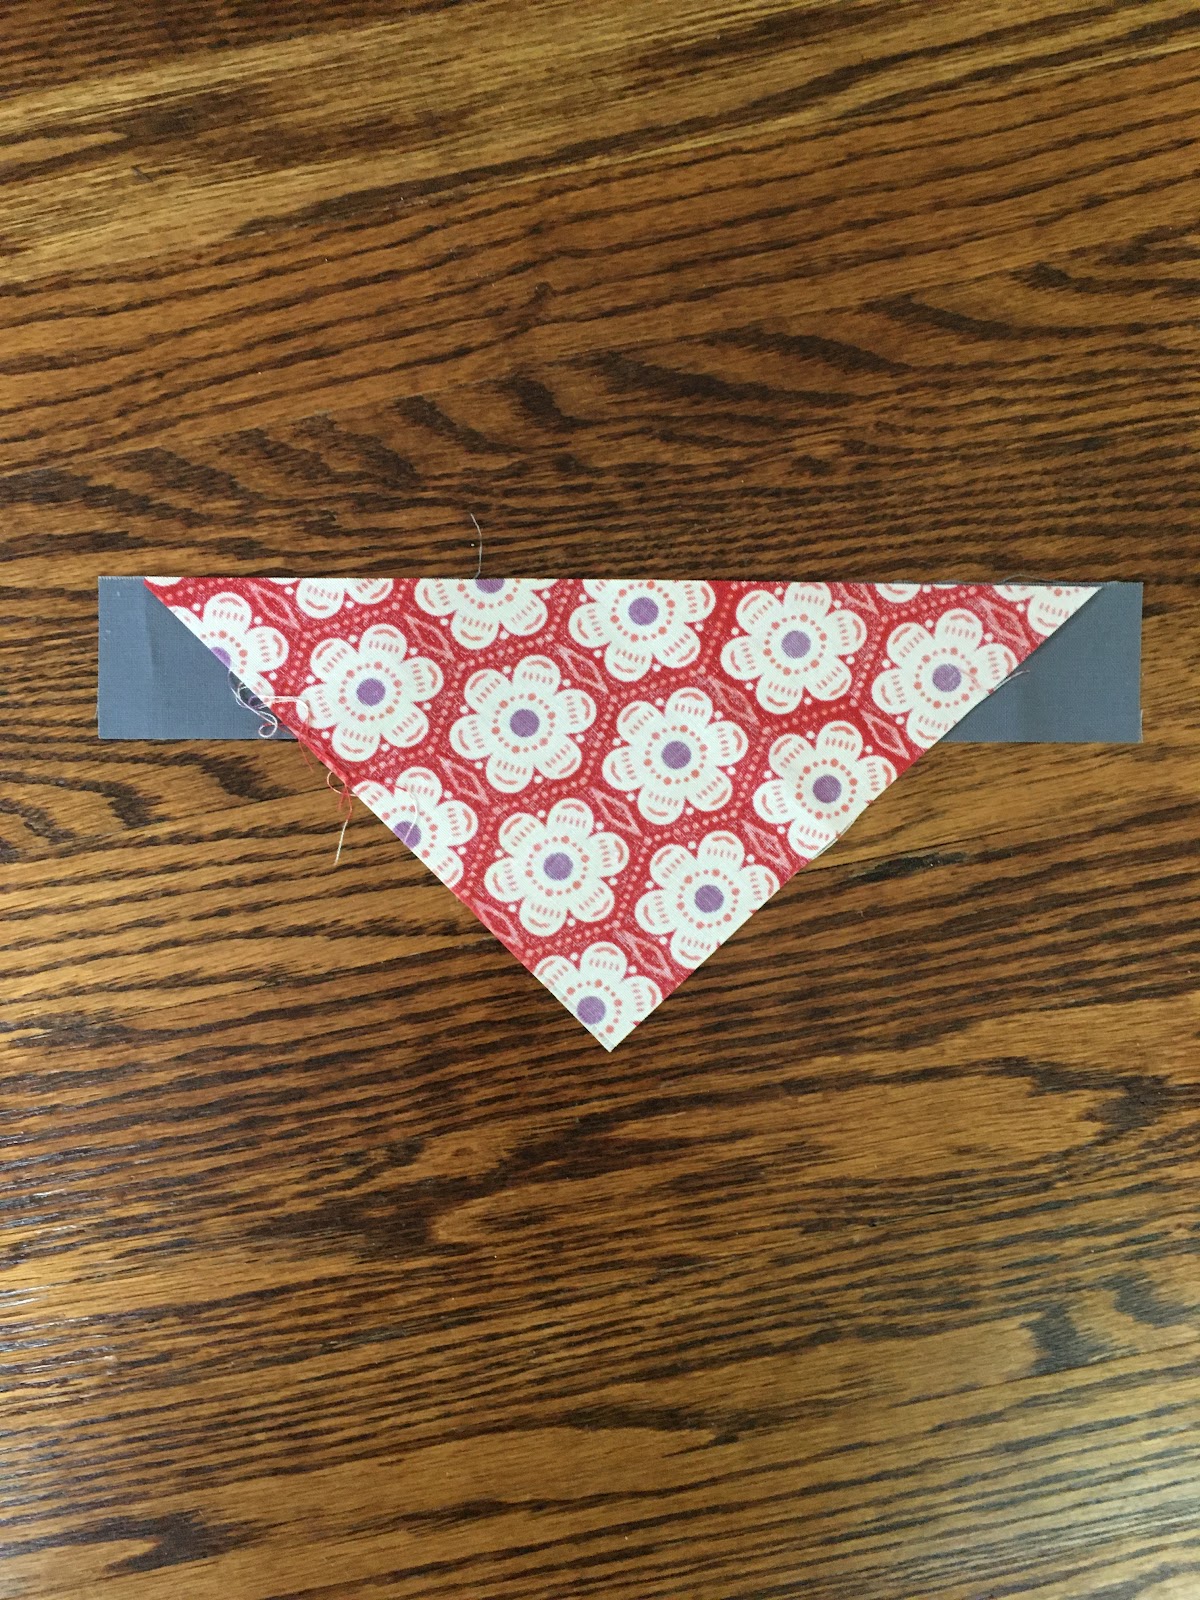
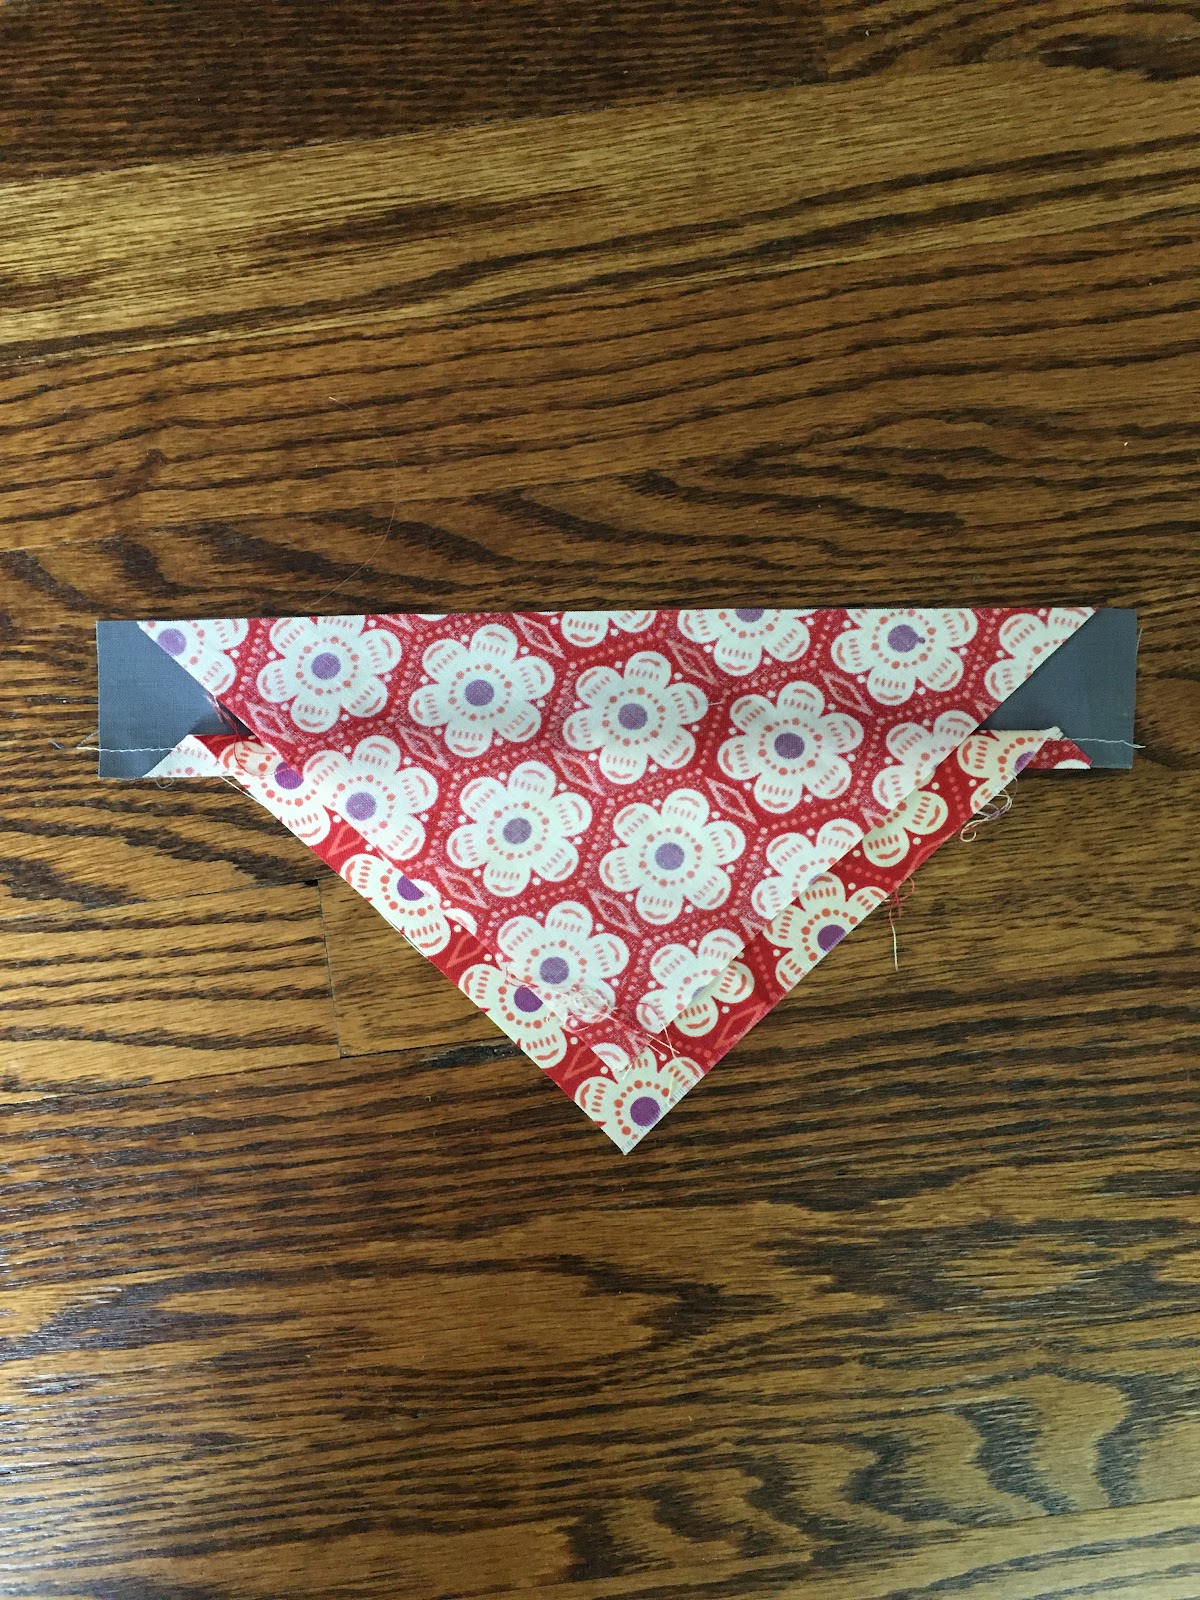
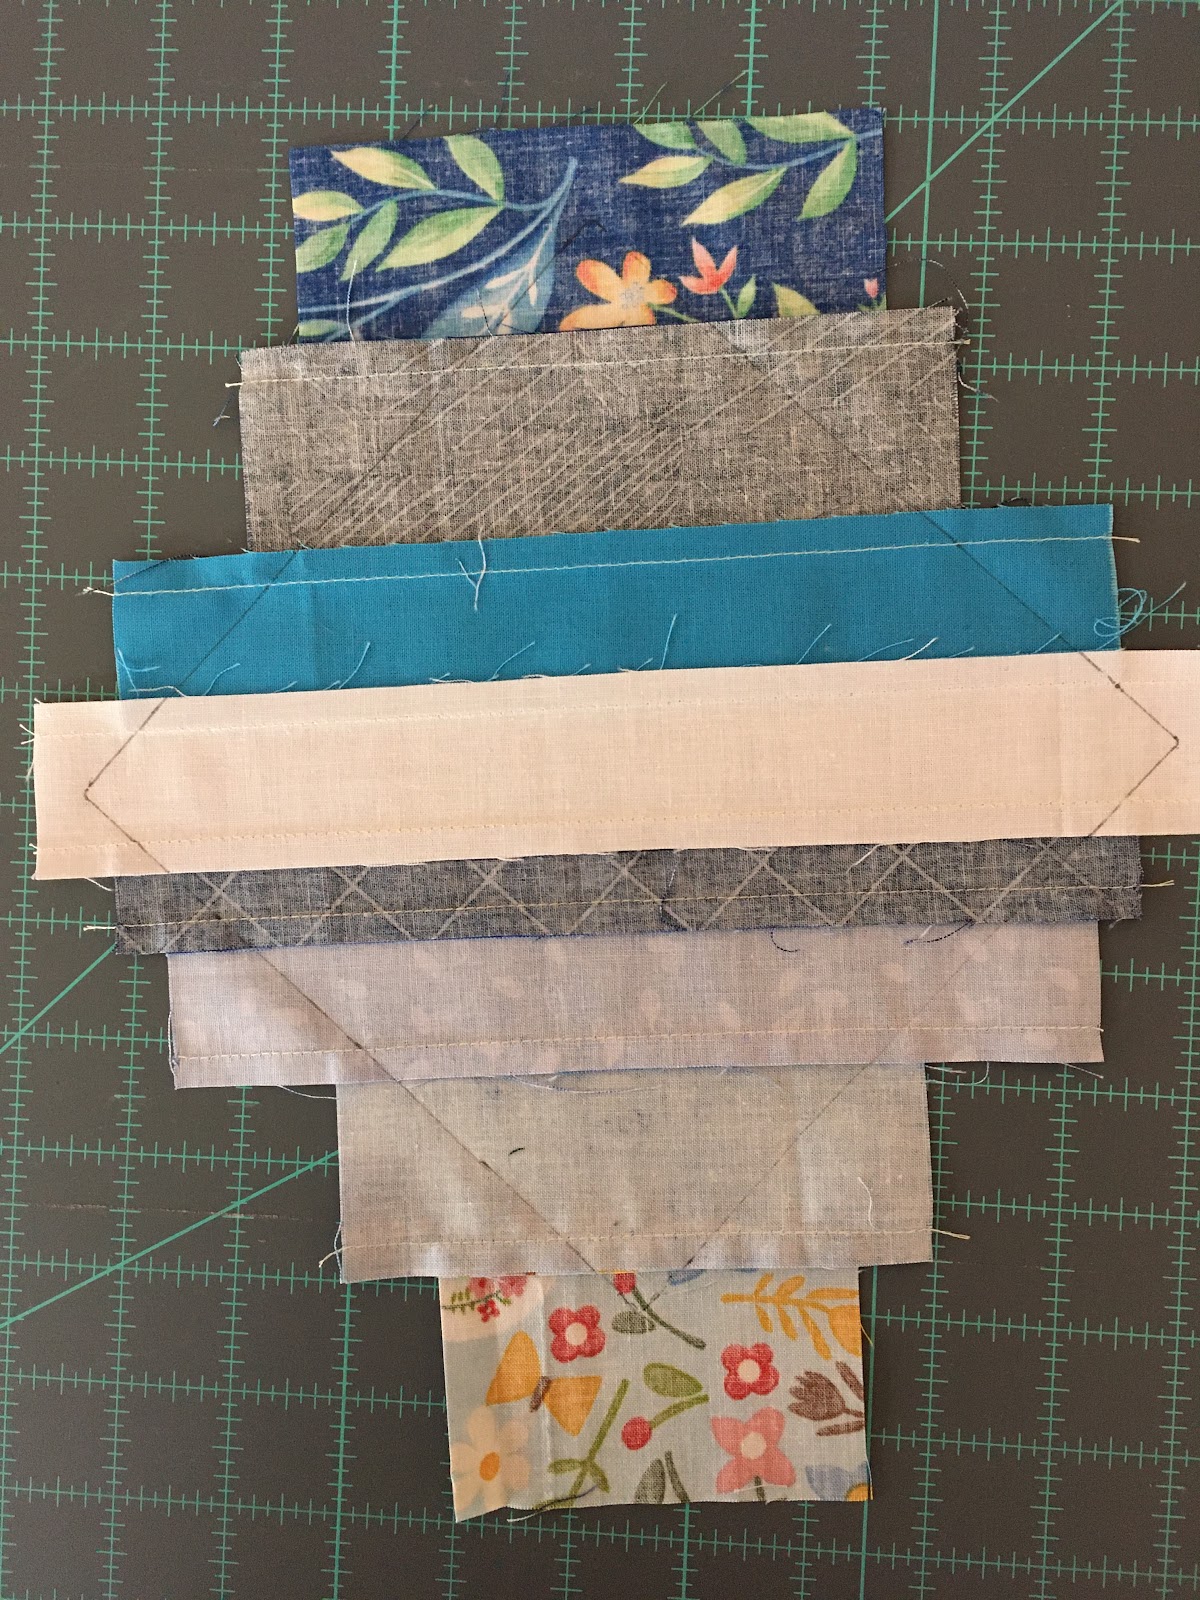
Place one white strip along the diagonal of the cardboard square.

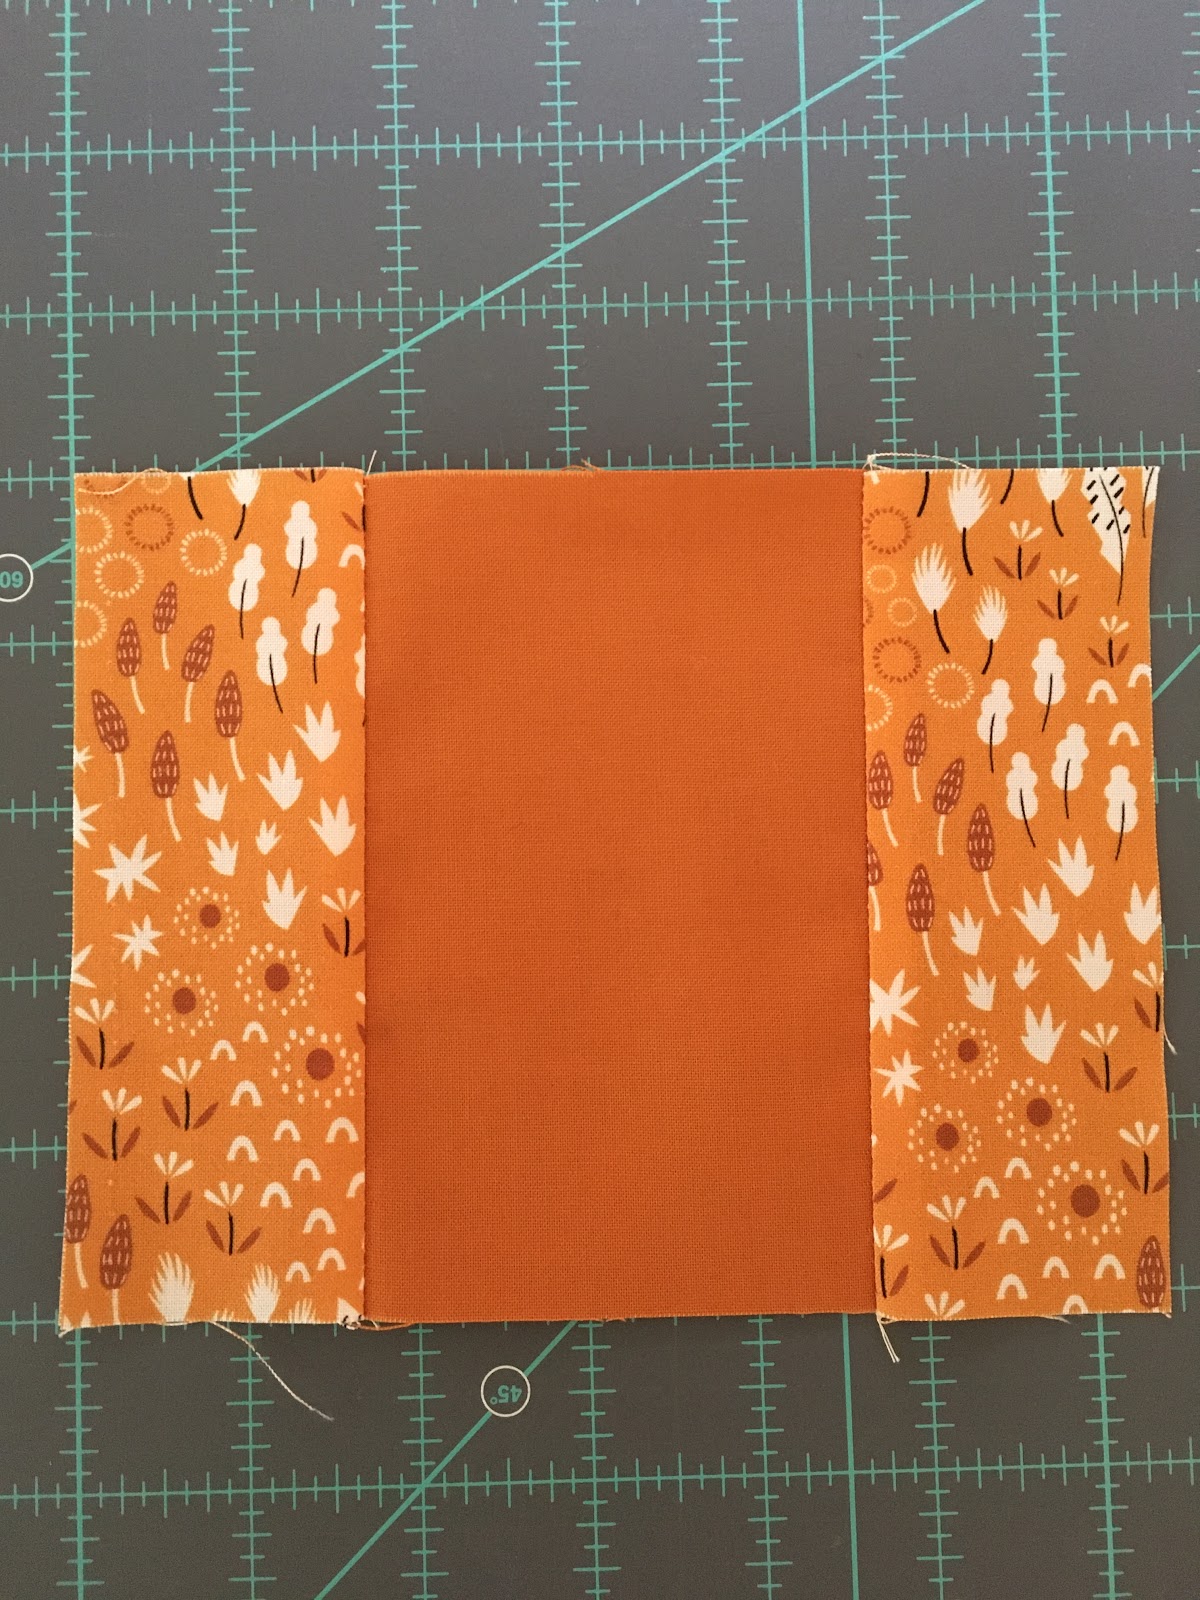
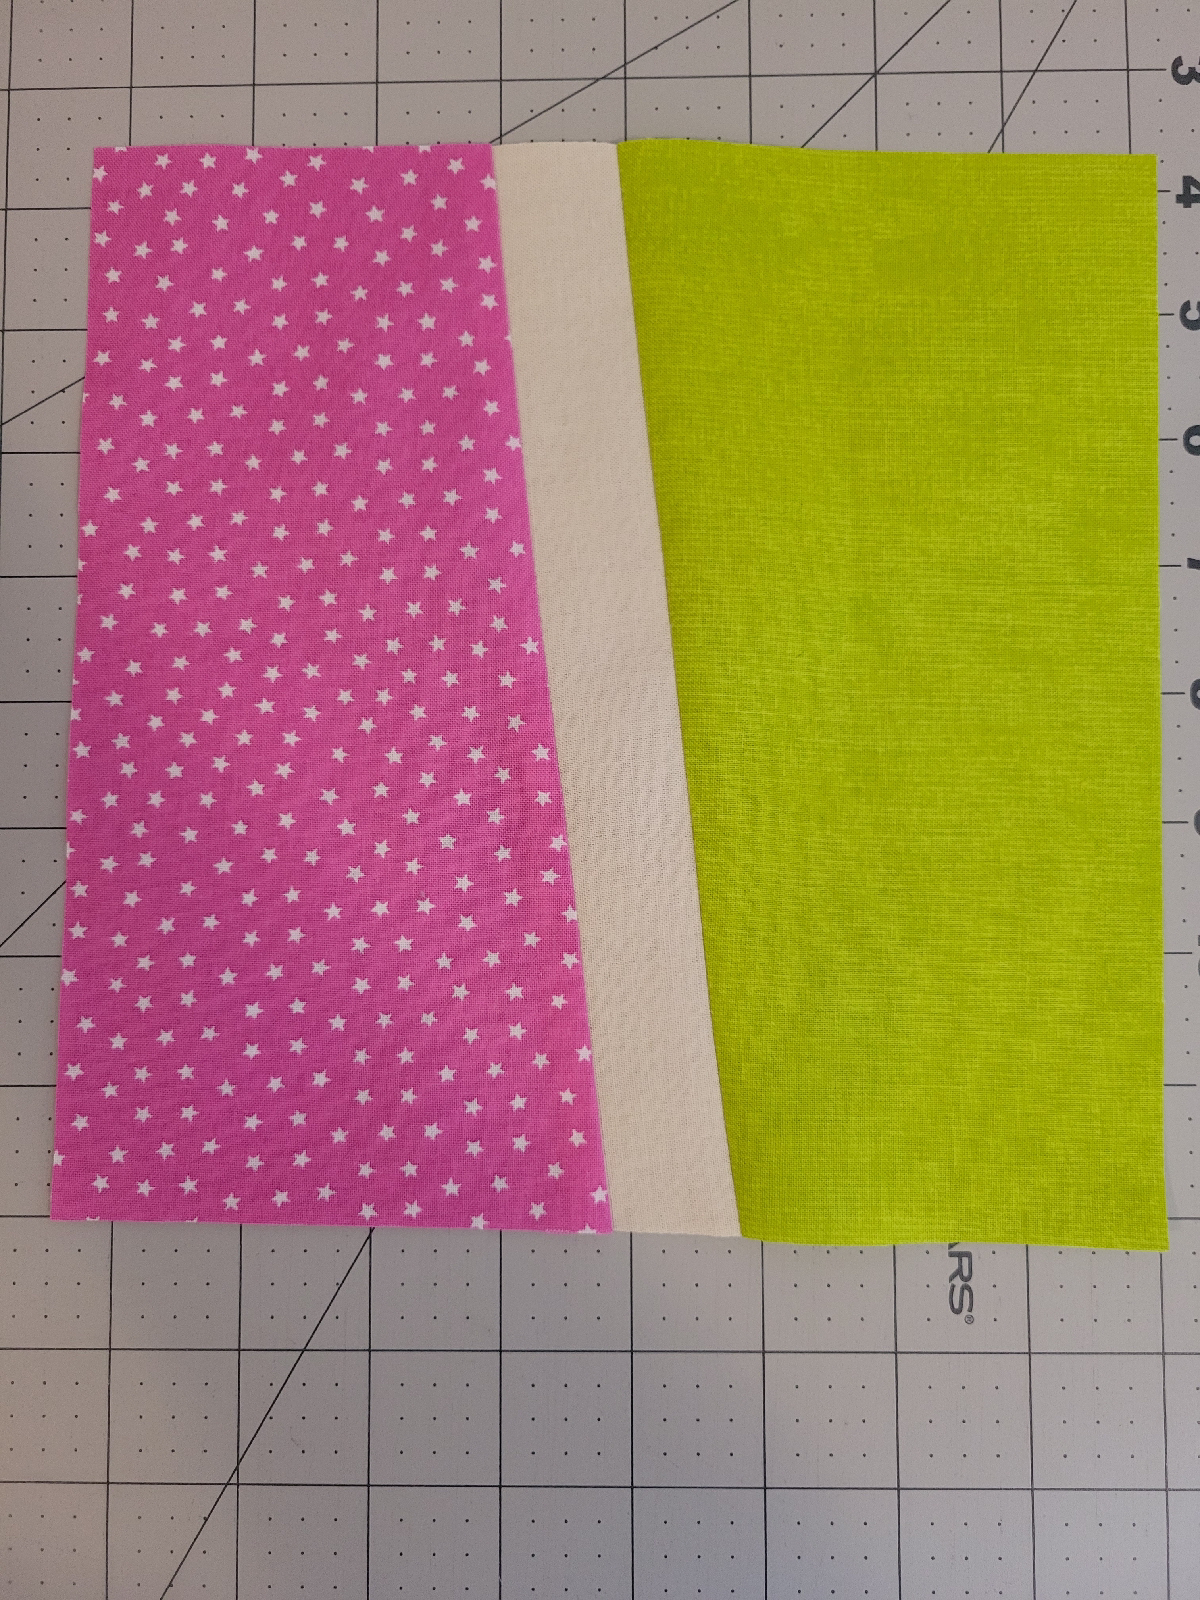
Cut 2 blue strips (or “strings”) of fabric slightly longer than the cardboard square.


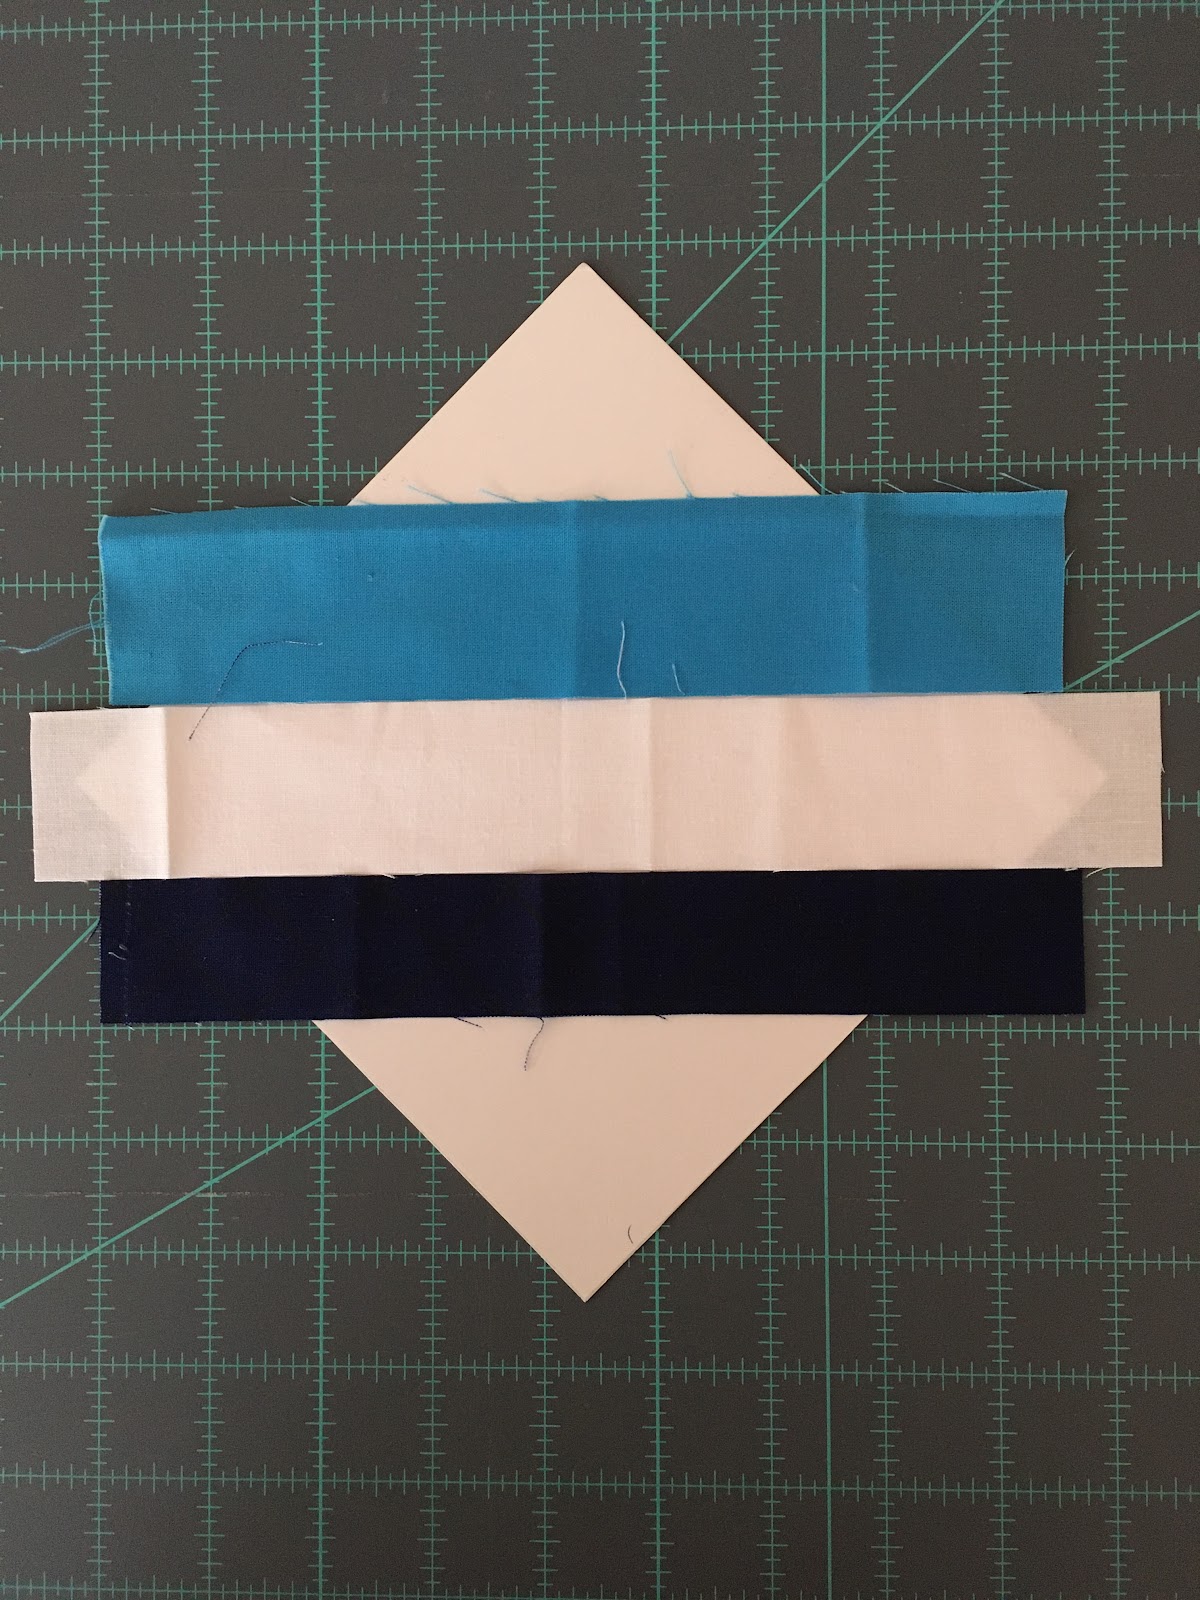
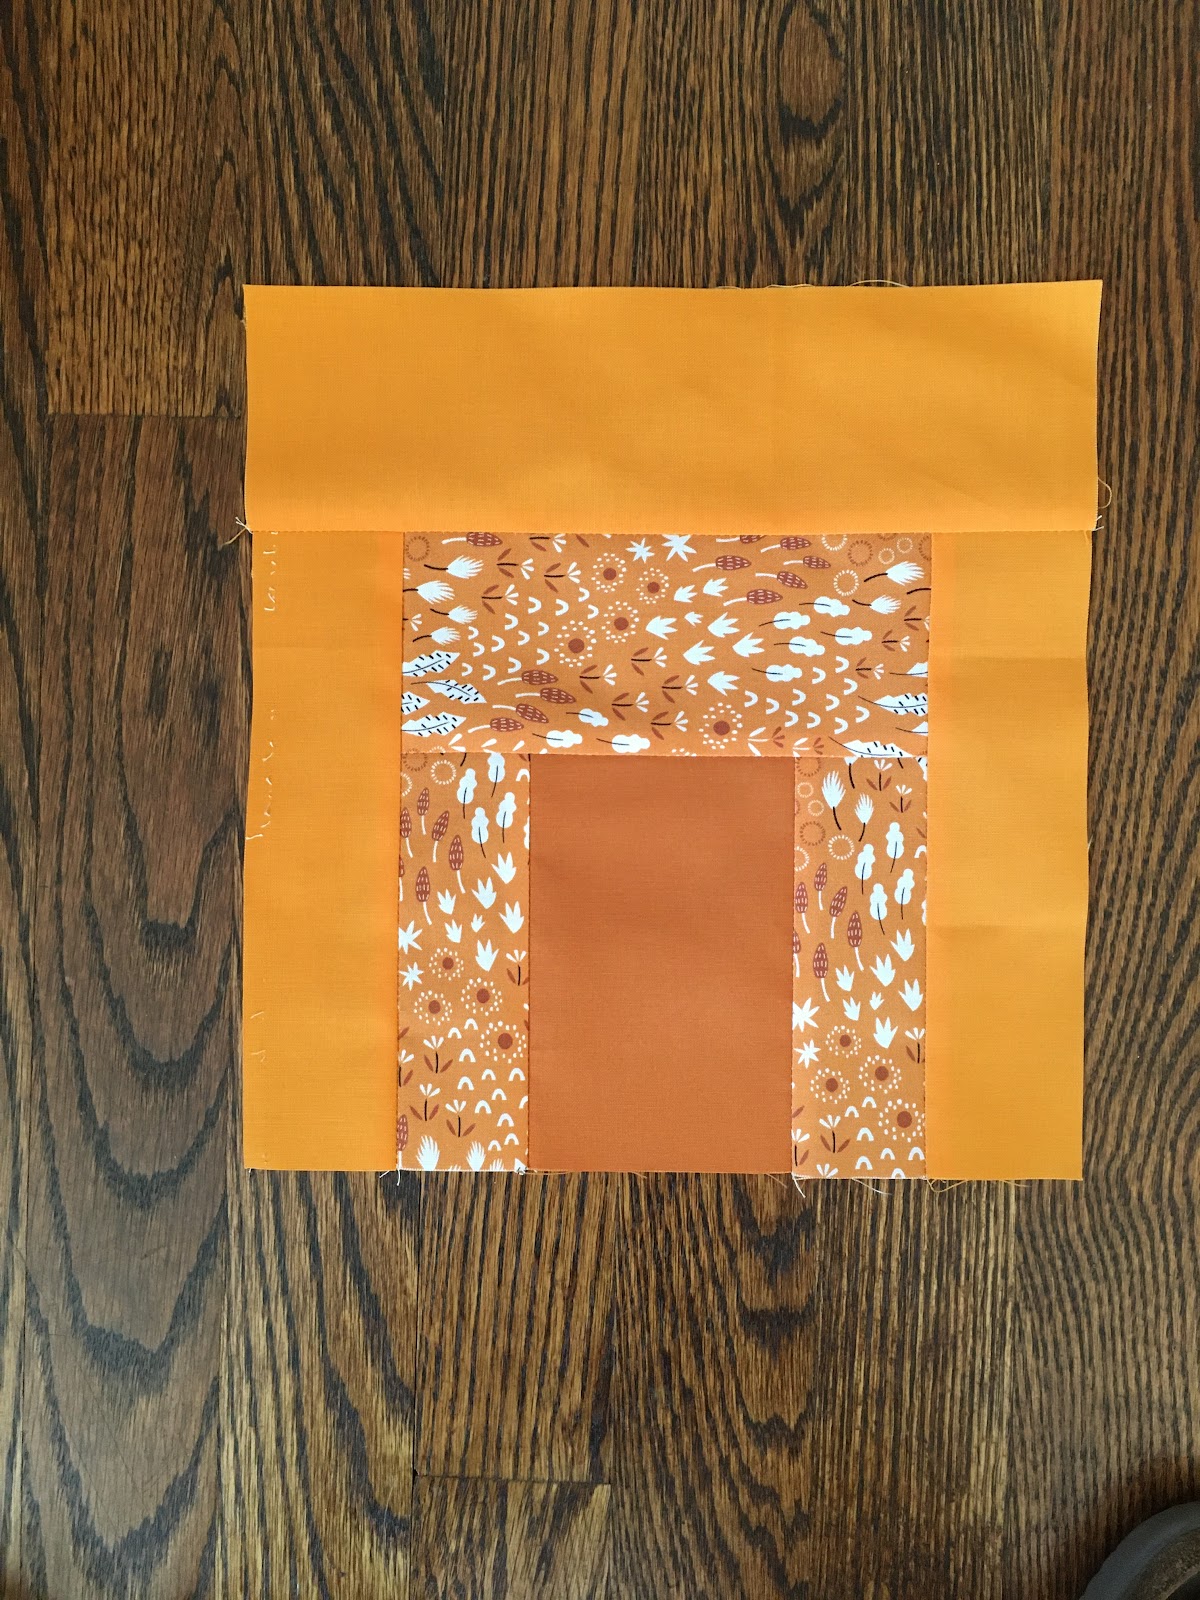
Stitch the blue strings on either side of the white strip, right sides together.  Press.


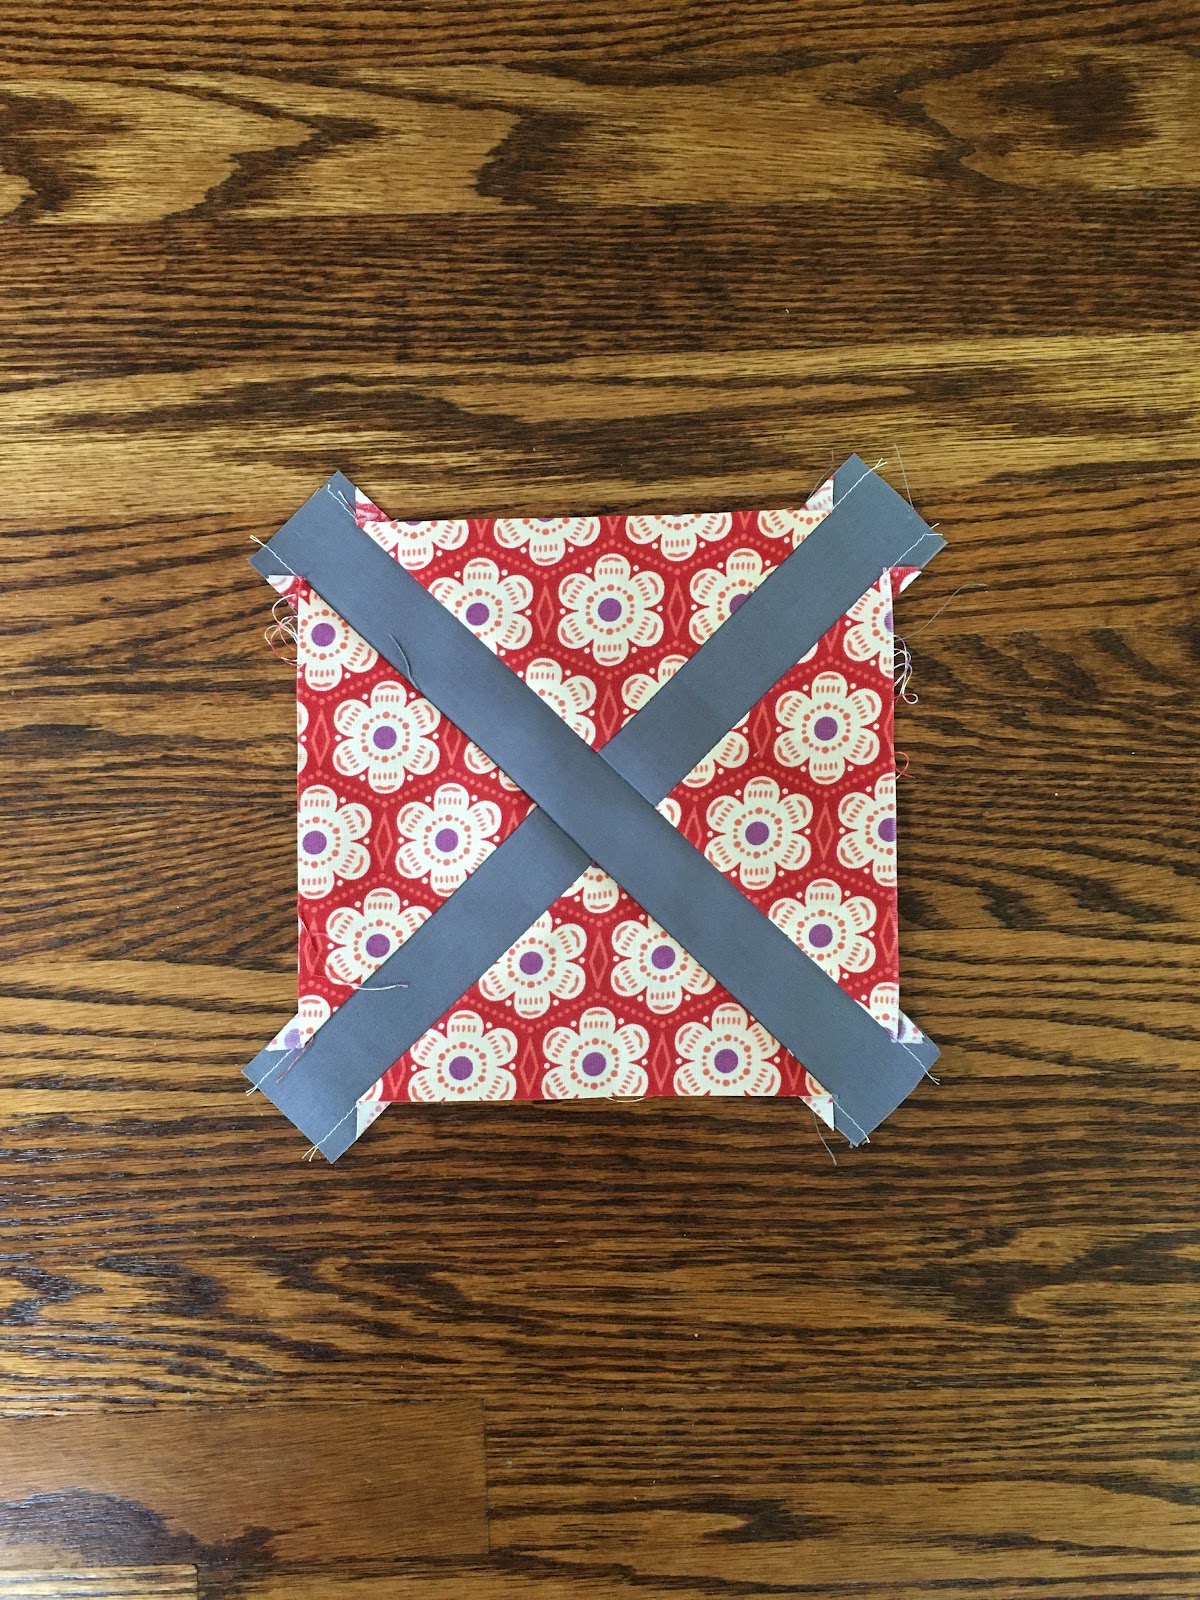
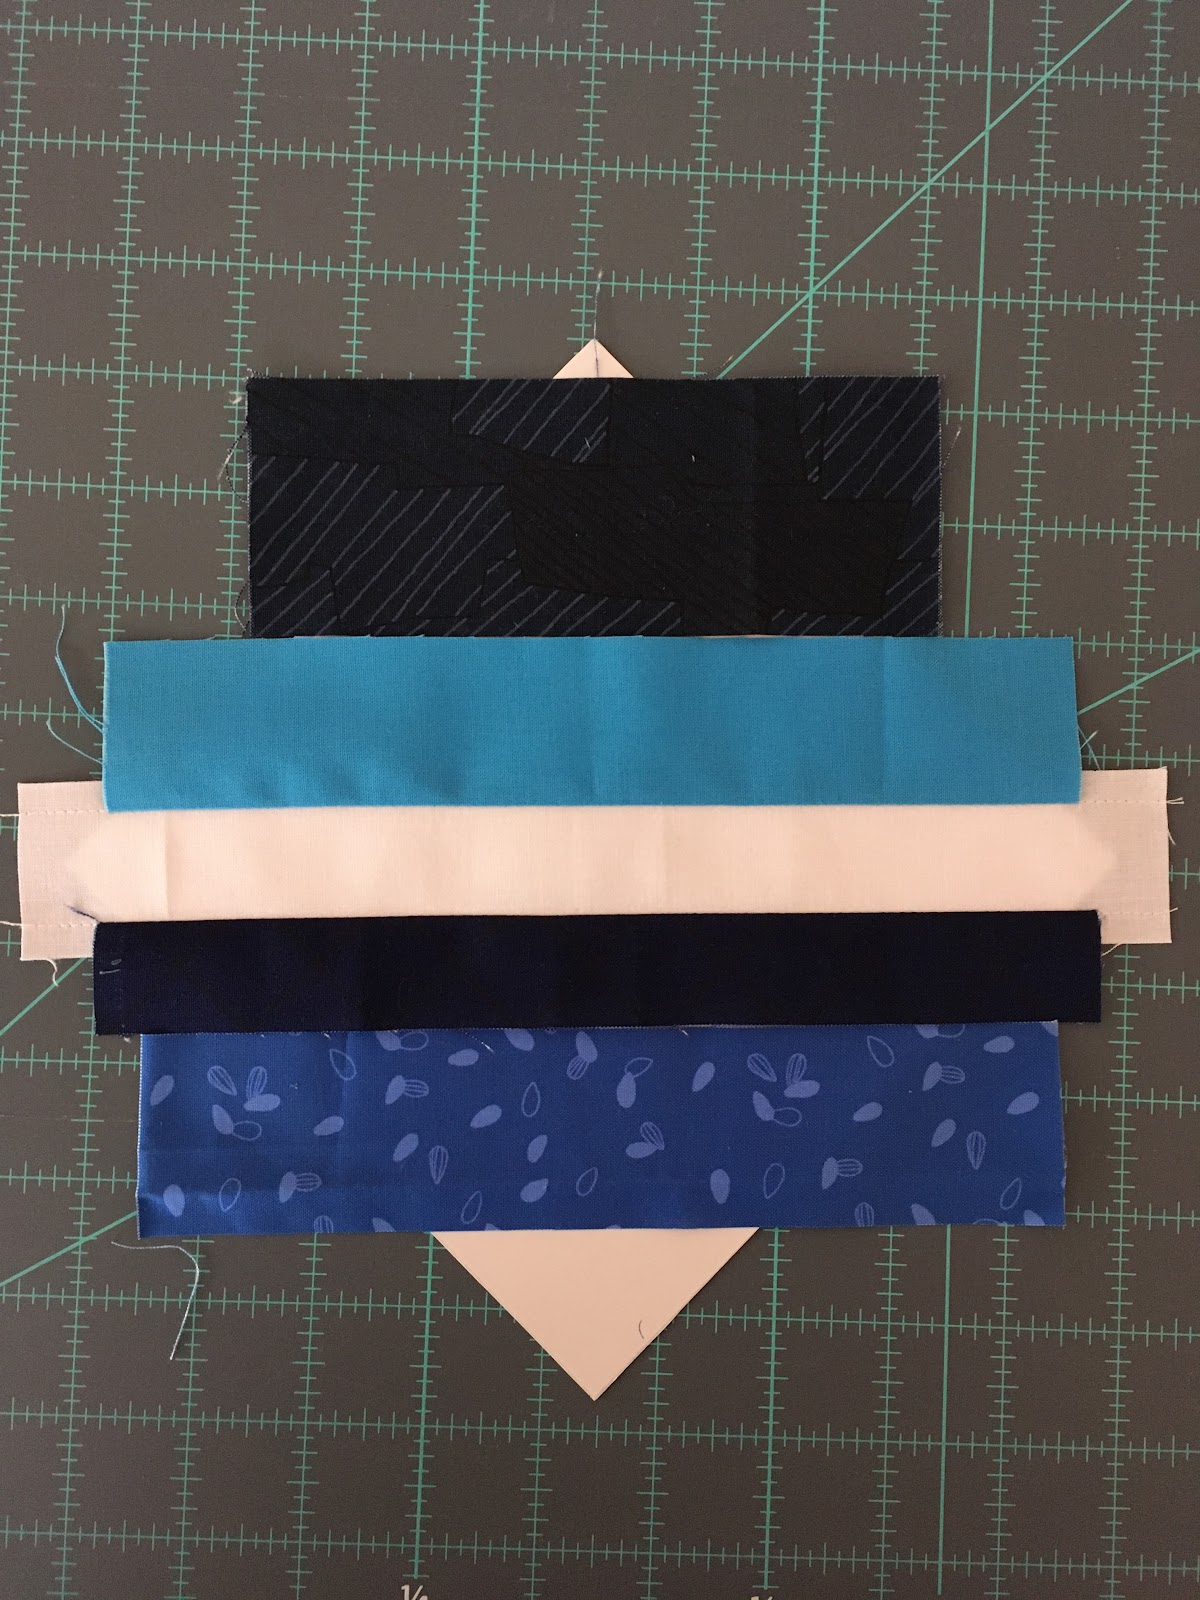
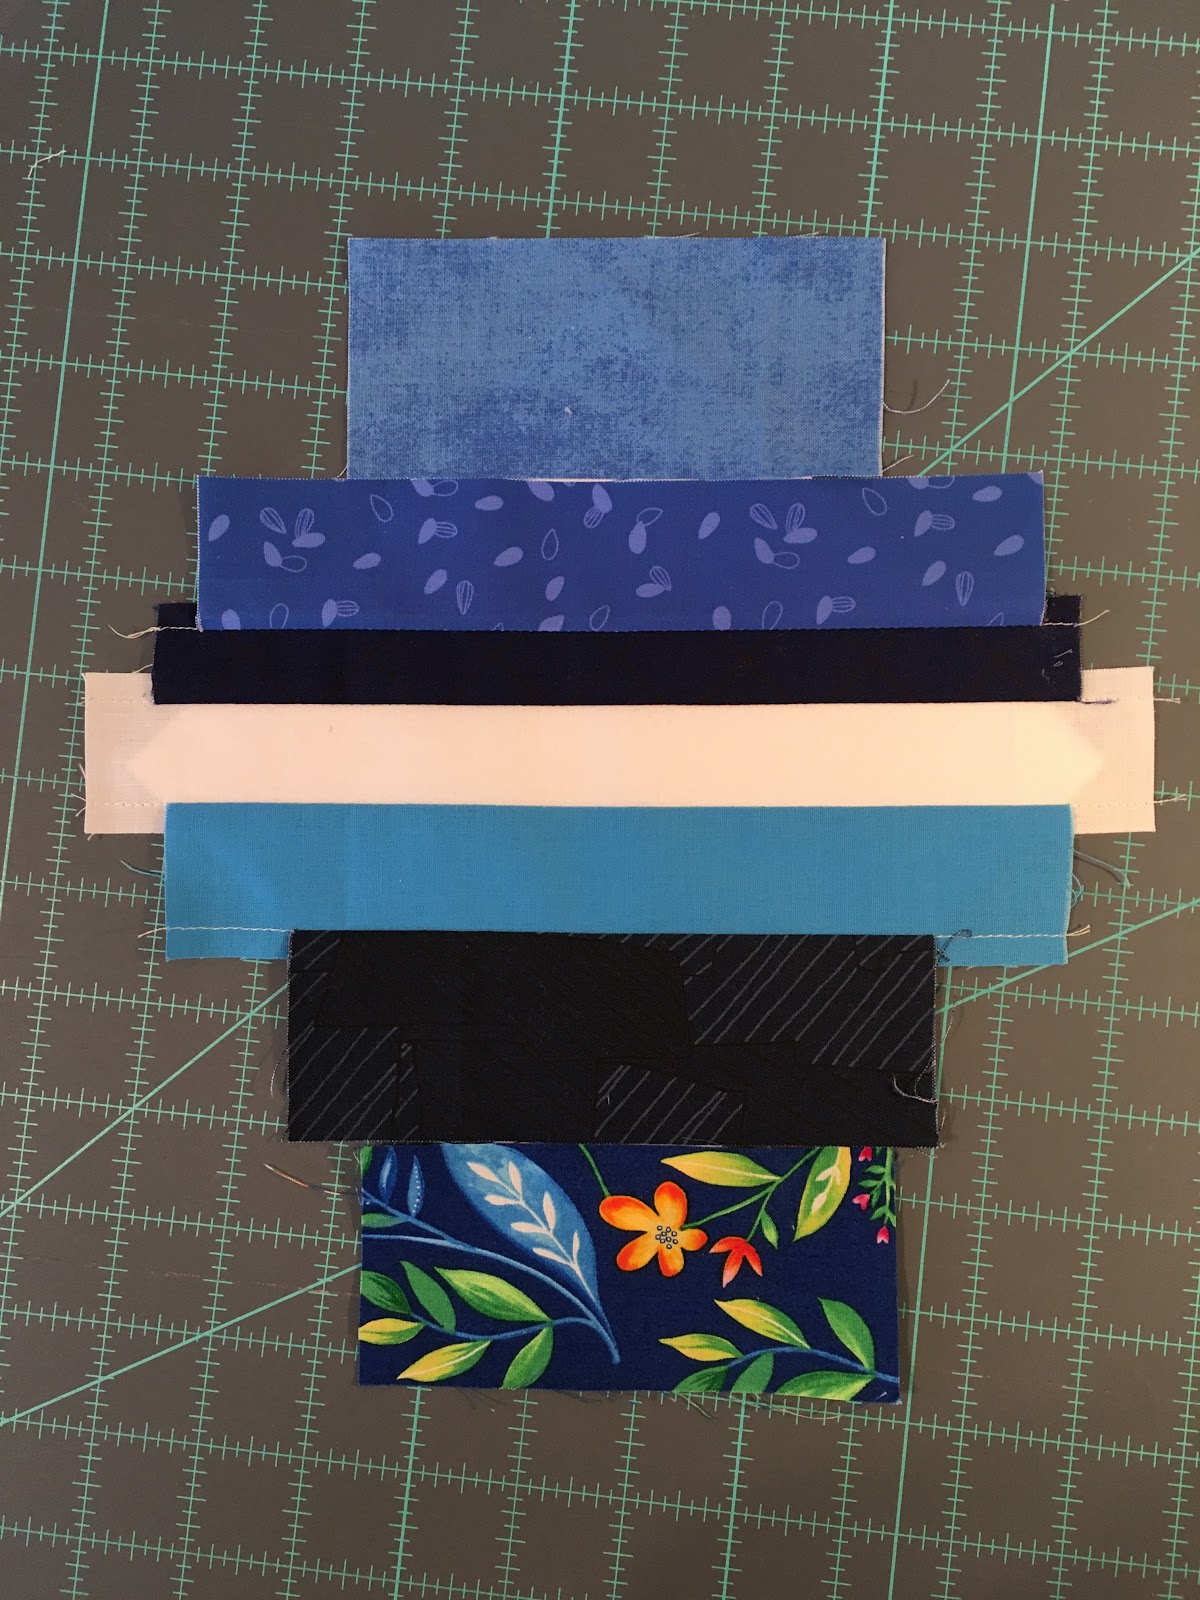
Add more strings, stitching and pressing until the card is covered. 


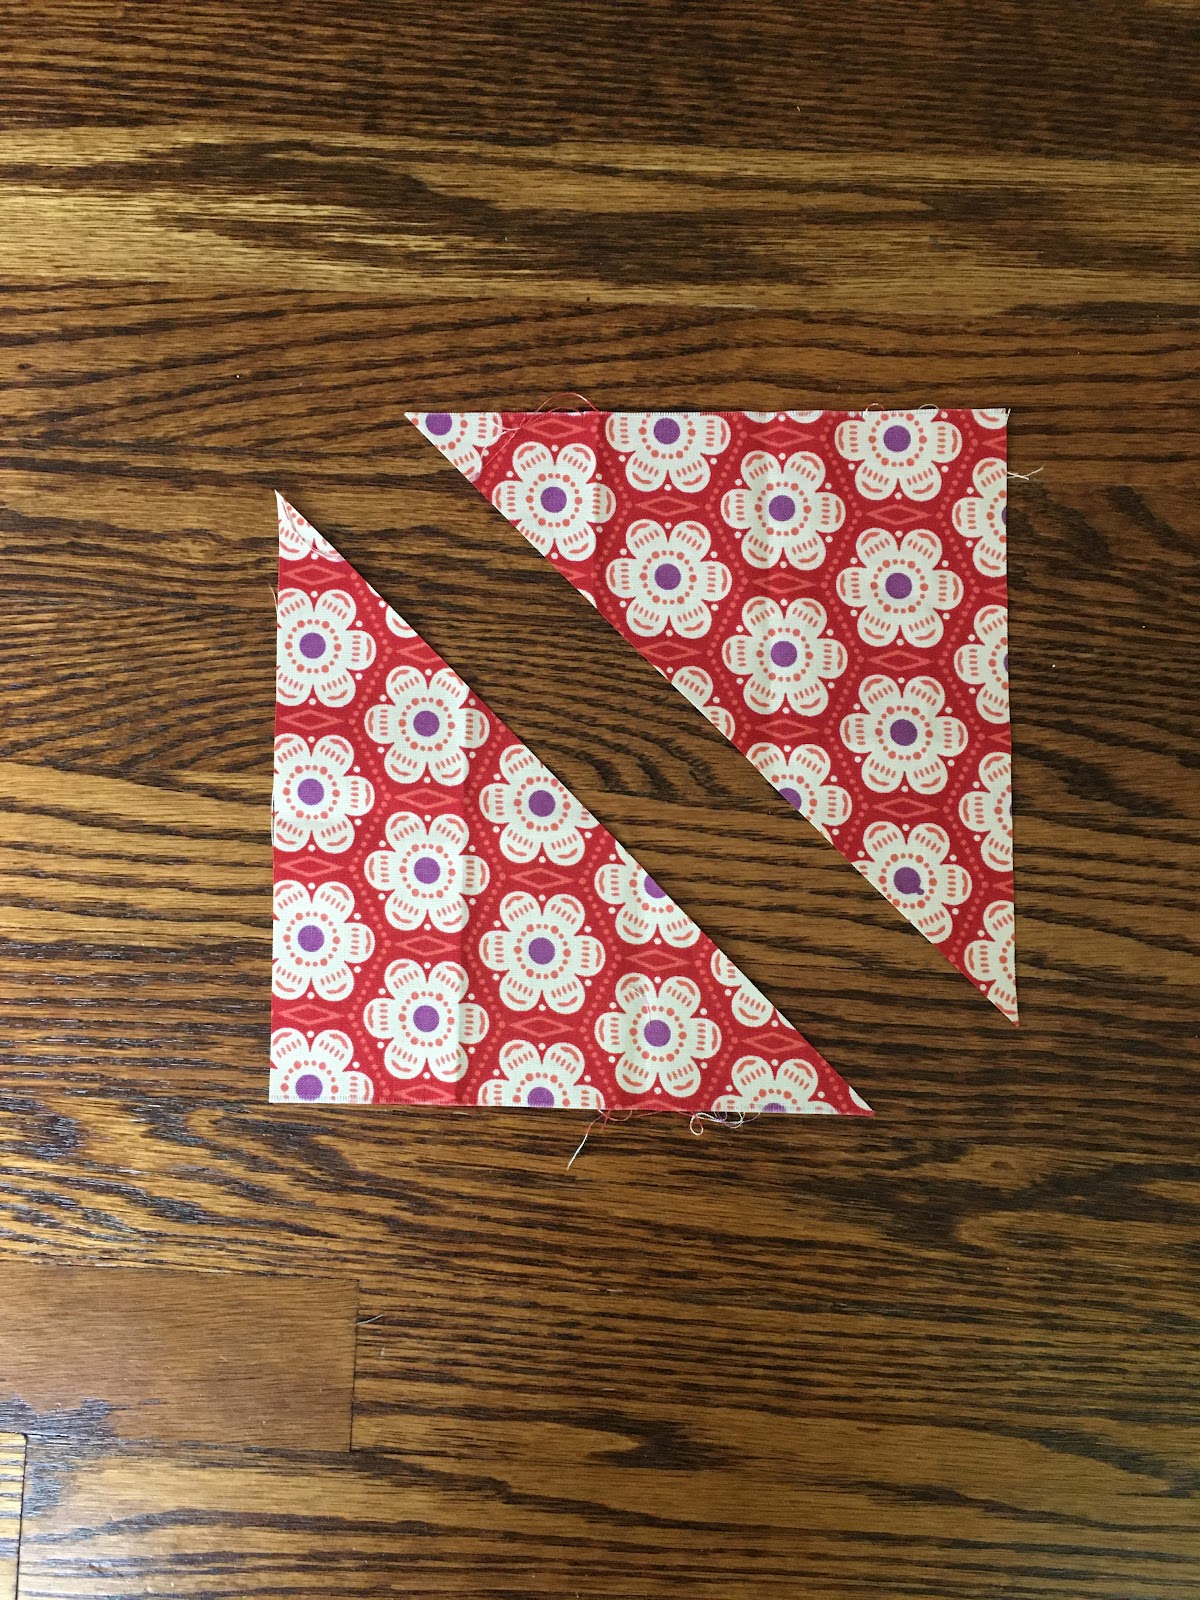
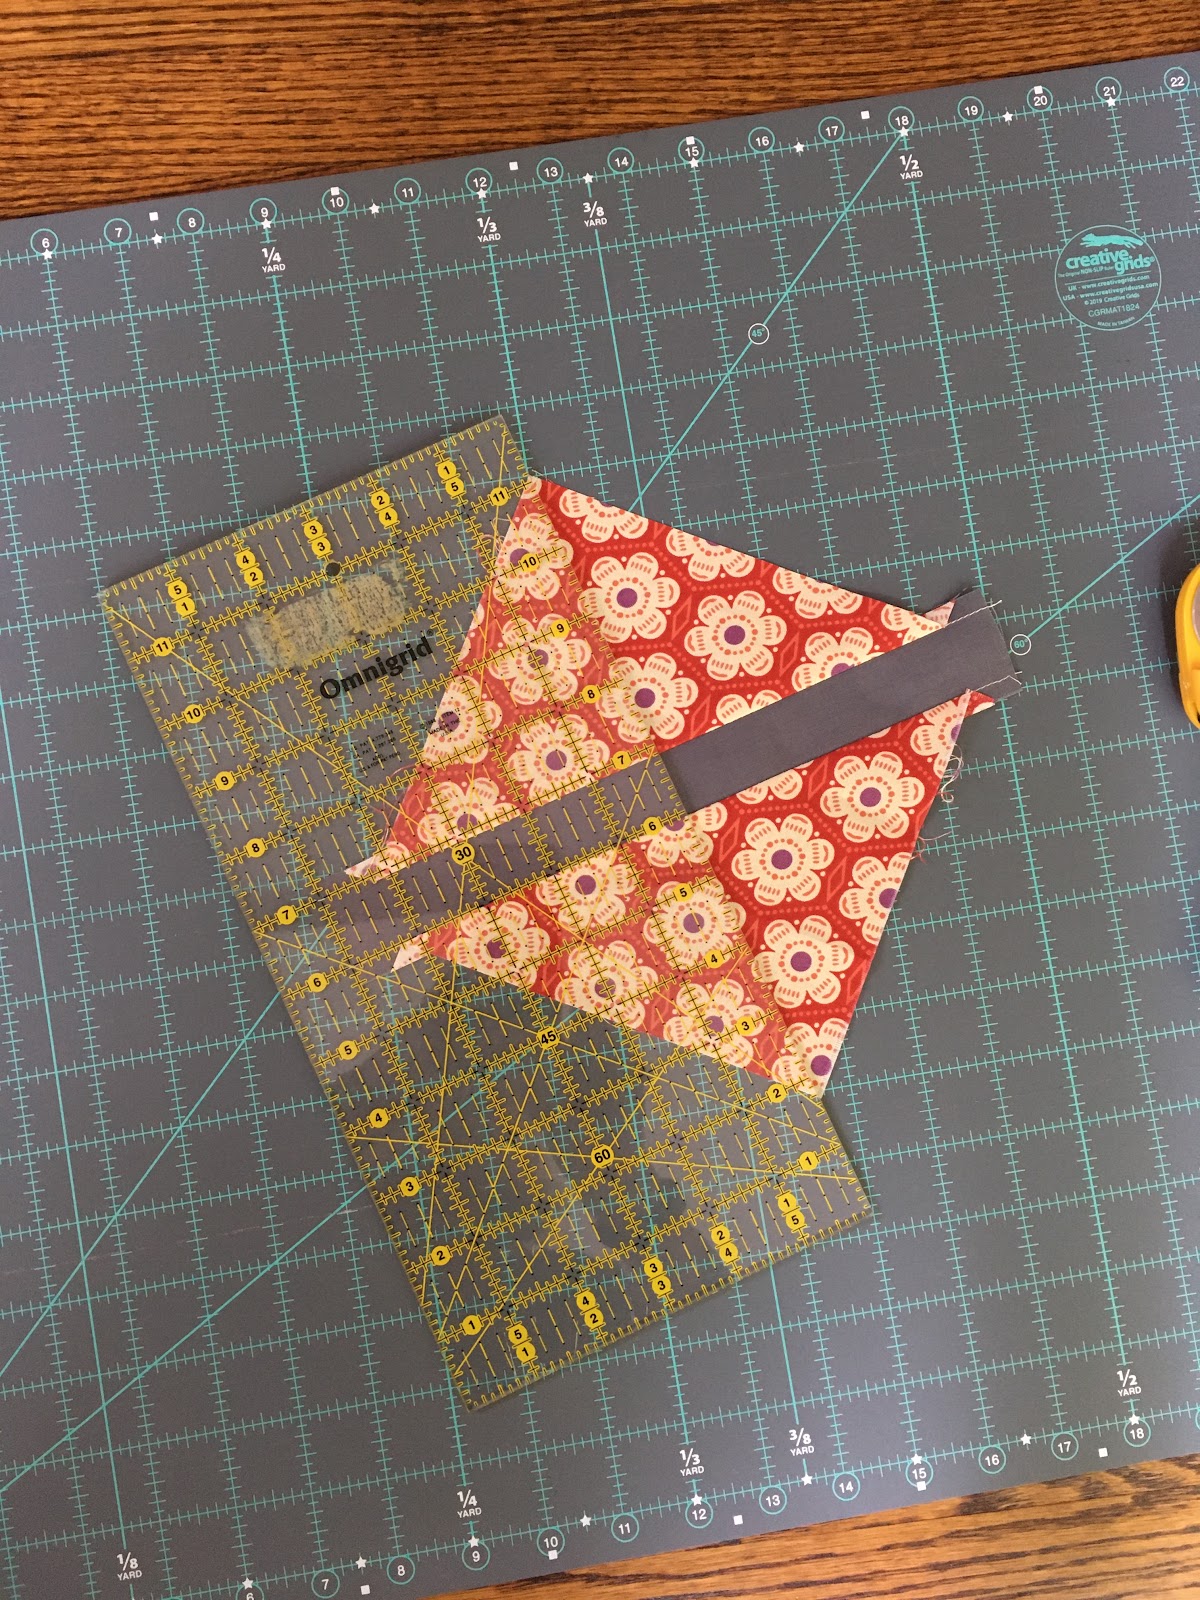
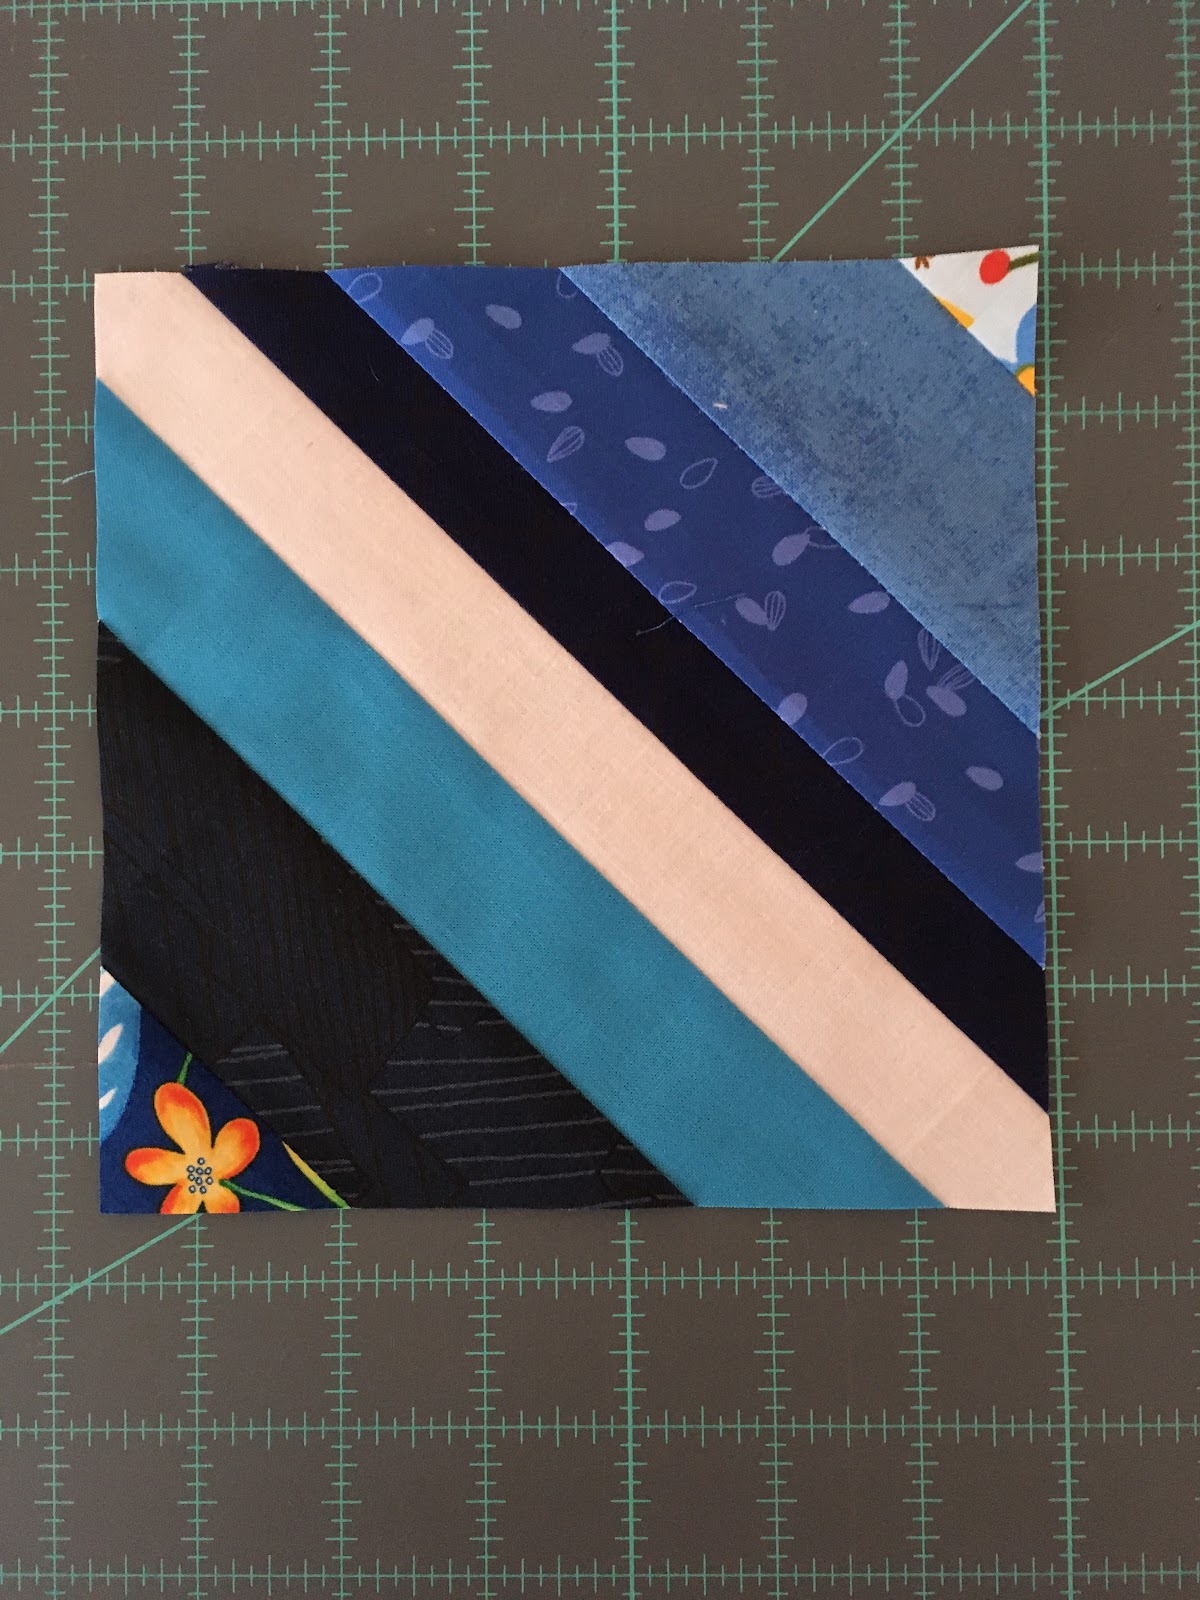
Flip the unit over and use the card as a guide to draw a square on the wrong side.

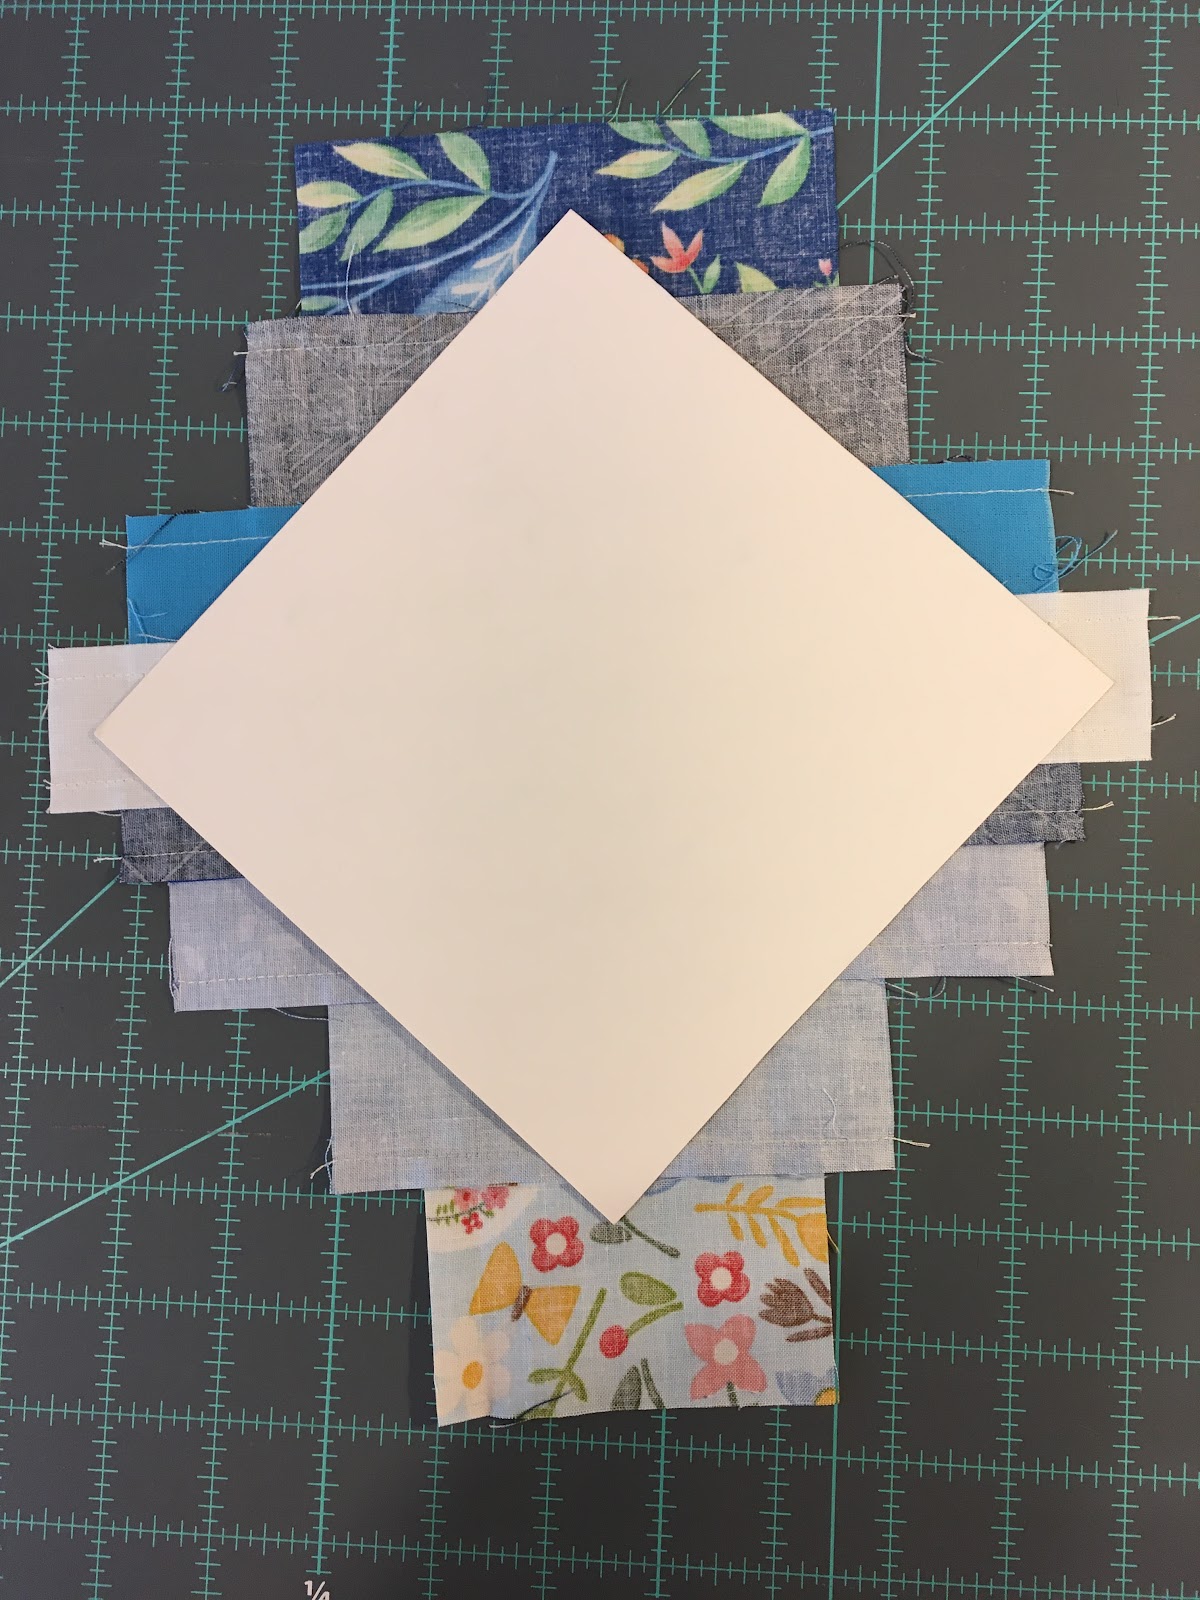
Using a rotary cutter and ruler, cut out the square.


Make three more units the same way.


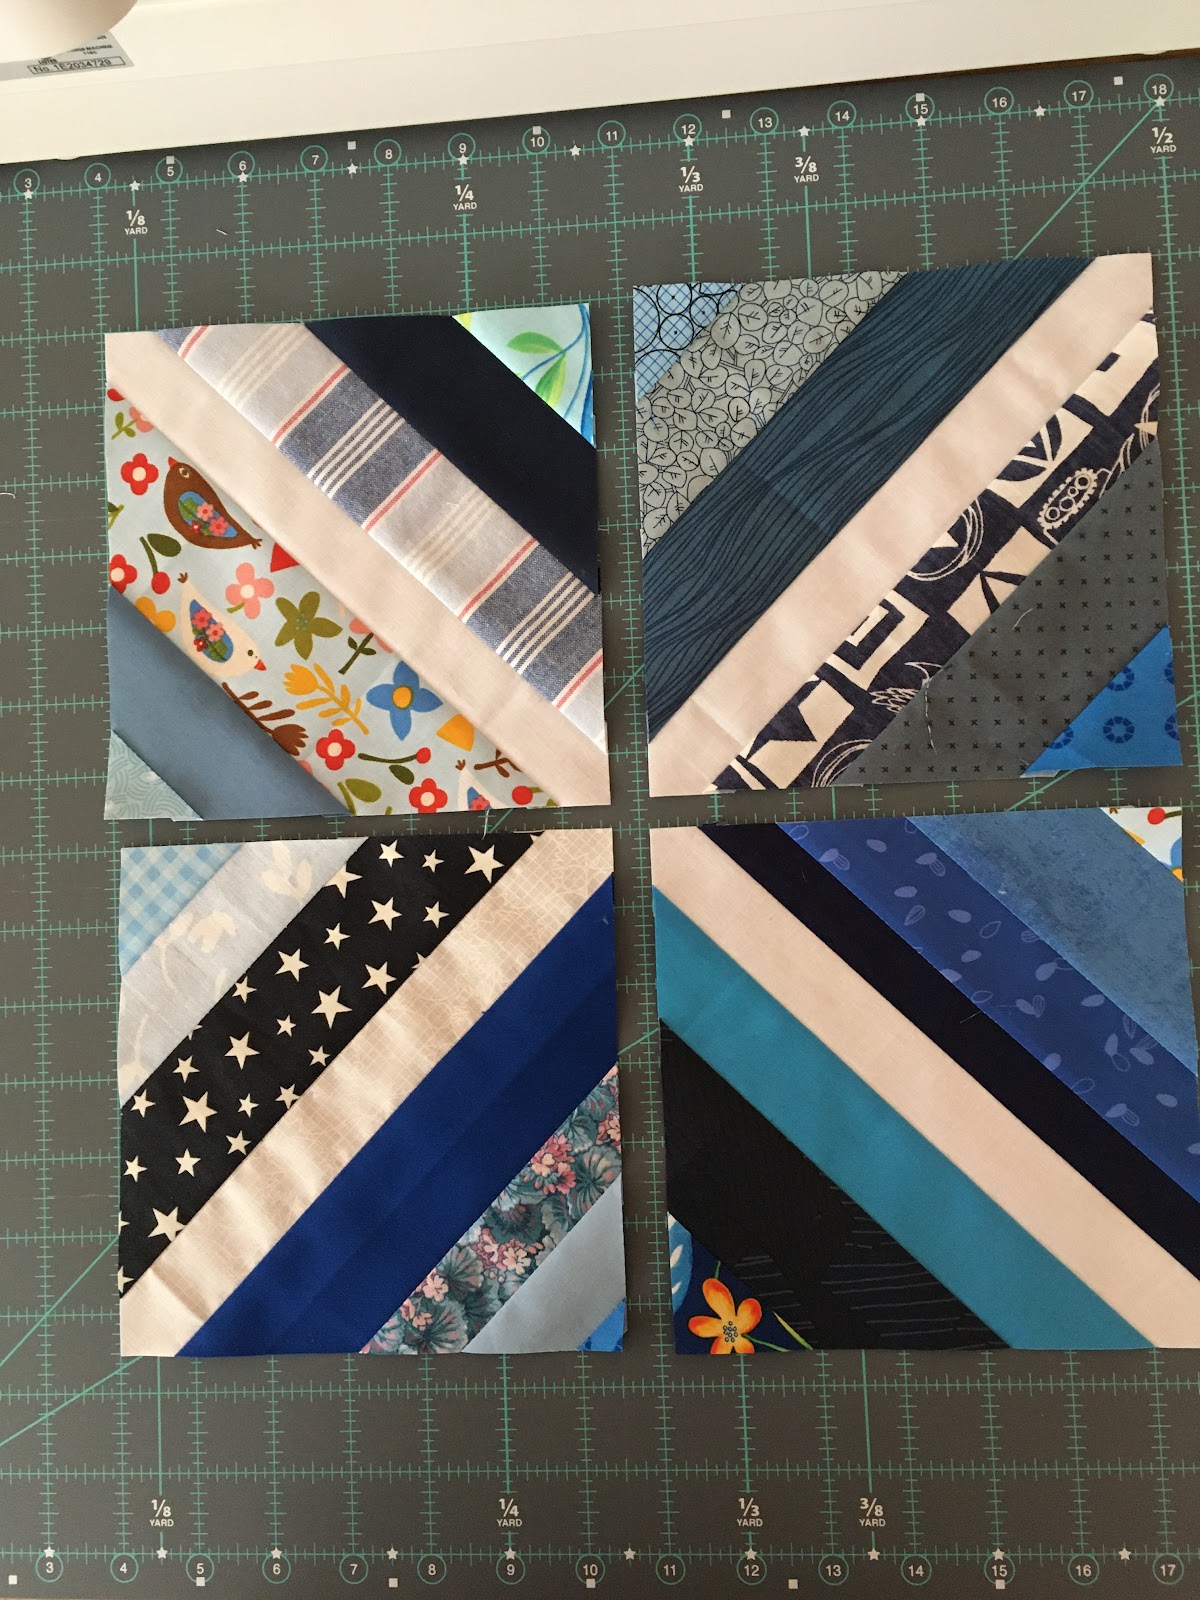
Stitch the four units together as shown, so they come together to form an X.  


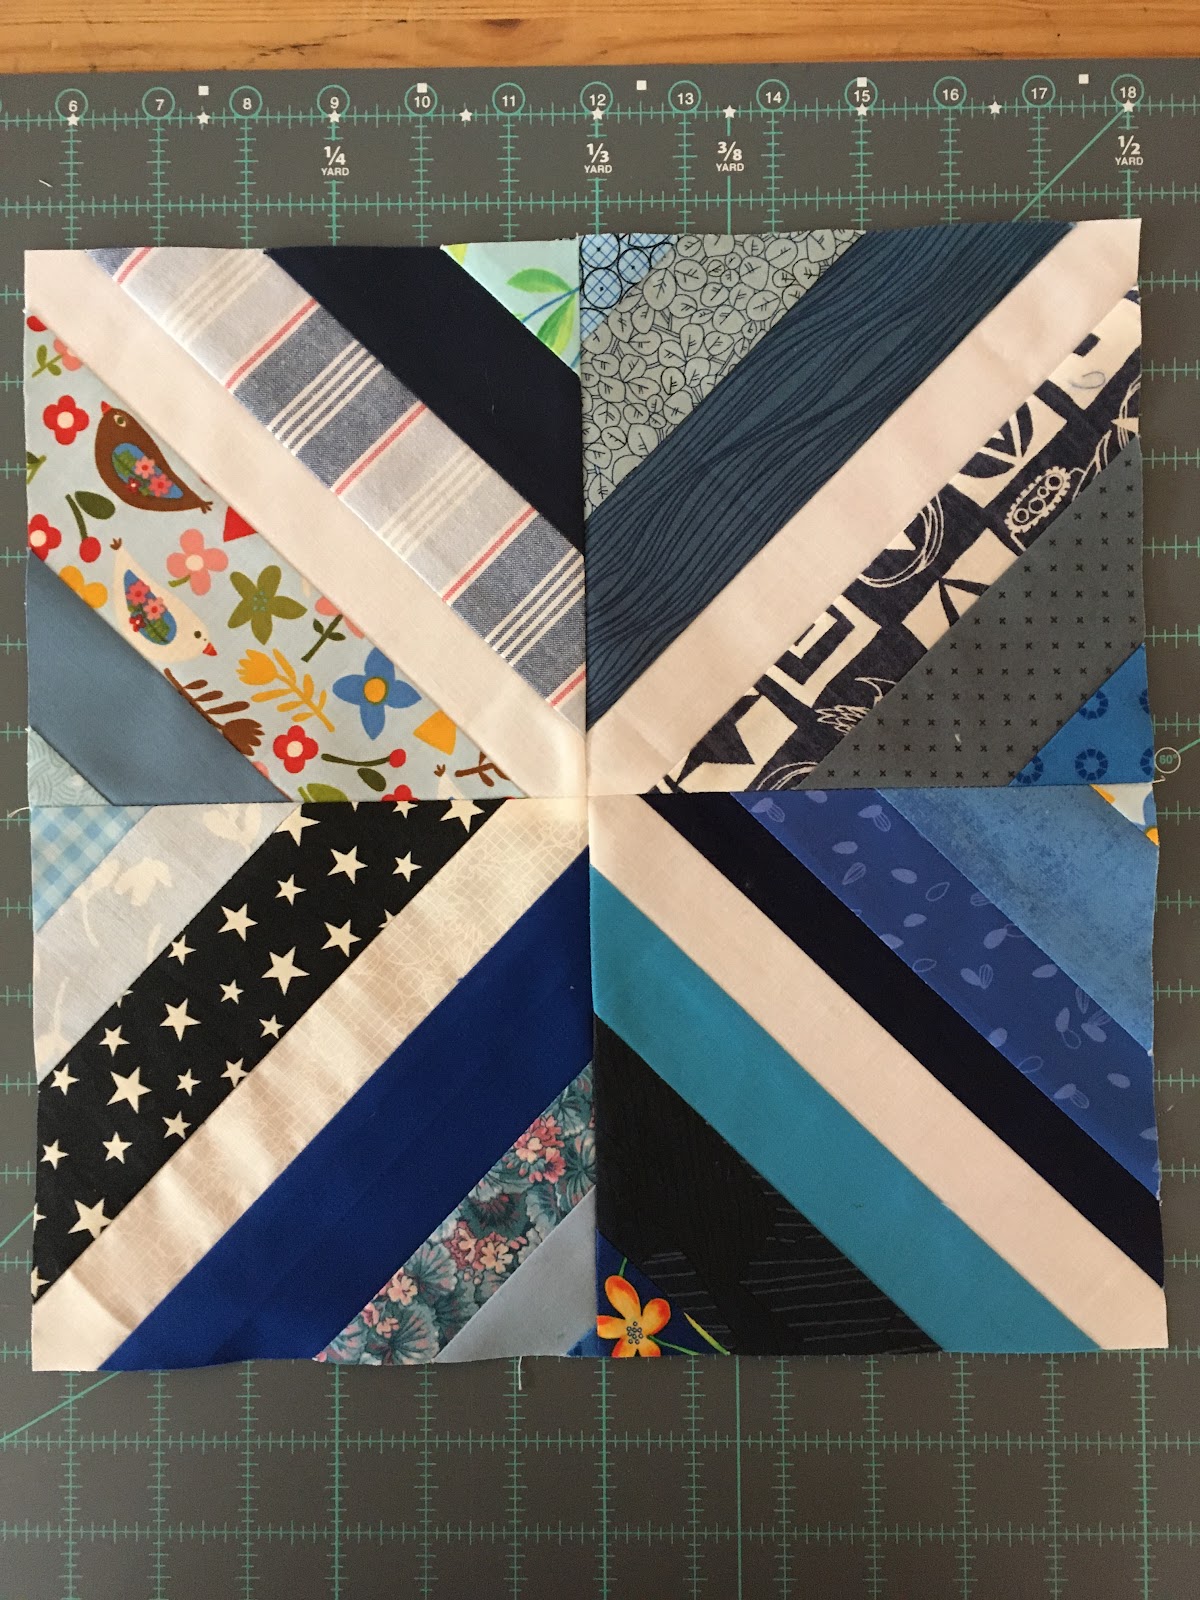
The block should measure 12.5” square.


Monday 23 October 2023

Block of the Month - October

 Another Ten Piece Block

In keeping with our tenth anniversary theme, here is another block made up of ten pieces of fabric.  For this block, I dug into the Ottawa Modern Quilt Guild Block of the Month archives, from 2015-2016.  I have changed up the colours.


Cut 2 - 2.5” x 12.5” strips of white

Cut 2 - 1.5” x 12.5” strips of white

You will also need additional 2.5” strips of white (see below)

Cut 3 - 2.5” strips of 3 random lengths (less than 10” long), in any shade of green or pink solids or near solids (tone on tone or fine prints that read as one colour from a distance).  Two pink one and one green, or two green and one pink, you get to choose.


Add 2.5” wide strips of white to each coloured strip, to make three 12.5” long strips.


You now have a total of seven 12.5” long strips.


Assemble strips in the order shown in the photo above:

1.5” strip white

Coloured strip

2.5” strip white

Coloured strip

2.5” strip white

Coloured strip

1.5” strip white


Block should be 12.5” square.


Monday 25 September 2023

Block Of The Year - The X Block

This block is inspired by the Cross Block from “Quilt Improv" by Lucie Summers.


1. For the background fabric - choose a colourful print - no white, cream, beige, grey or black.

For the X - any shade of grey solid


From the background print cut - 1 square 6.5”x 6.5”

From the grey solid cut - 2 strips 1.5”x 10”


2. Cut the square in half on the diagonal. You now have two triangles.


3. Centre the long side of one triangle (right sides together) on the long side of a grey strip. The strip is longer than the triangle (on purpose), to allow for trimming in a later step.


3. Sew the triangle to the strip with a ¼” seam.

4. Centre the second triangle on the opposite side of the same grey strip, right sides together and directly opposite to the first triangle. Sew. Press both seams. Do not trim.


Sew. Press both seams. Do not trim.


5. Cut the resulting unit in half along the diagonal perpendicular to the grey strip.


You now have two triangles bisected by a strip of grey.


6. Add the second strip in the middle between the two triangles, as in steps 3 and 4 above. Press.


7. Trim the block to 6.5” square, centering the X. Don’t worry if your block is not perfectly centered - these are improv-ish blocks.


That’s it! Make as many as you like, all year long. We will collect them at each in person guild meeting, and make a draw at the June meeting for all the blocks.

Fall Themed Tunnel Block

This month’s block is inspired by Rachel Hauser’s Tunnel Block Tutorial on her blog, Stitched in Color. I have resized it, but kept her idea of monochrome blocks, moving from dark to light in the same colour as the block is stitched.

Colours 

I’ve taken my colour inspiration from the fall leaves. Choose red, gold, orange, or yellow for your block. You will need four fabrics in only one colour to form a gradient from dark to light. Solids are fine, or near solids and simple prints. The block is sewn in 4 layers with the darkest coloured fabric
at the centre (A) and the lightest coloured fabric at the outer edges (D).

Here are my fabric choices, all in yellow-gold:


Cut as follows:
From fabric A - 3.5" x 5"
From fabric B - 3" x 6.5" and (2) 2" x 5"
From fabric C - 3" x 9.5" and (2) 2" x 7.5"
From fabric D - 3" x 12.5" and (2) 2" x 10"


Sew the 2" strips of B to either side of A. Press.


Then add the 3”x 6.5” piece of B at the top.


In the same way, add layers C and D. Always join the 2" wide strips first, press, then add the 3" wide top piece.


The unfinished block measures 12.5”x12.5”.

               
The unfinished block measures 12.5" x 12.5".


Sunday 27 August 2023

It's that time of year again!

We're getting ready for our biggest and best year yet -- OMQG's 10 year anniversary!

Our first meeting is on Monday, September 25th.
We can't wait to share all we have planned for the coming year! 

Sneak peak:
  • Retreat in November 
  • Tara Faughnan lecture and workshop
  • Sarah Goer workshop
  • More sew-in days
  • 10 year anniversary activities!

May be an image of card, office and text that says 'ATTENTION! DON'T FORGET TO RENEW YOUR MEMBERSHIP TO THE OTTAWA MQG! See the link in our bio for the form We have a lot in store for the next year, including exciting 10 year anniversary activities'

Sunday 28 May 2023

May BOM

For our last BOM of the year, we're going to be making a Slash and Dash block inspired by the San Diego MQG. It was one of their blocks that they made charity quilts out of. Since there were no instructions, I've written out my own version. I've included a few inspiration images from the San Diego MQG.


The colours of this block are cream, pink, and lime (light green). The dash part is a solid cream colour and the side/background are to be pink or lime (light green). Both parts are to be different fabrics. I've included some colour inspiration/ideas. 

To make these, you can make 2 or 4 at a time. 

Colours: Cream, Pinks, and Lime (light green)

Finished size: 8.5x8.5 in


Cutting instructions:

2 (or 4 if you choose to make 4 at s time): 10in x 1.5in in CREAM

2 (or 4 if you choose to make 4 at s time):
9in x 9in in PINKS or LIME (light green)


Instructions:

1. Stack your pinks or greens in a pile, linning the edges up. 

2. Make a slightly diagonal cut near the middle area of the square.


3. Mix the colours up, making sure to keep each side separate.


4. Sew the cream piece in between each of the coloured pieces.


5. Press and trim. Trim the block so that it's 8.5in square. 


6. Bring them to our June meeting!

Monday 15 May 2023

Sign up for the OMQG/PEIMQG Mug Rug swap!

As mentioned at our April meeting, we are doing a Favourite Colour Mug Rug Swap with the PEIMQG this summer! 20 members of the PEI MQG have signed up so we need approx. 20 participants for an equal swap.

Specifications: The only information you will receive (and they'll receive) is your partner's favourite colour! No bigger than 6'x6". Can be square, rectangular, circular, etc. Once signups start coming in, Jenn will email you with a partner colour!

Please bring your finished Mug Rug to the June OTTMQG meeting!

We will need first and last name, email address (to distribute swap information, and in case Jenn needs to get in touch over the summer) and your favourite colour.  

Sign up sheet

Monday 24 April 2023

April BOM

To go hand in hand with the programming of our Monday meeting, the BOM will be an applique block! These needleturned applique circles can be whipped up in no time and are great to do in front of the TV or other activities. 


Colours: SOLID BLUES AND WHITE

Sizing: 8 in square (cut 8 1/2in, then trim is needed to 8in)

Instructions:

Out of either a blue or white solid fabric, cut an 8 1/2in square (the appliqué might shrink the background fabric a bit, once finished putting you circles on, trim to 8in)

For the circles, make your own circles or print them out. I recommend using circles between 2 to 4 in, but you can pick the sizes you want to include. 

Placement: Place the circles anywhere on the square, but try to keep it about 1/2 in from the edges for trimming and seam allowances. You can add as many circles as you want and they can overlap.

How to prepare circles: Trace the template on the circle fabric, then take your scissors and cut about 1/4in around the drawn circle (seam allowance). 


Pin or thread baste your circle to the background and continue using the basics of needleturn applique. Once you're done adding circles to your background, press to remove markings (if you used a heat erasable pen).

Needleturn applique tutorials:

https://youtu.be/gAo4NG53rVs

https://youtu.be/khZnGx9U5Y4


Reminder: CQA challenge night!

Hello everyone, at the April meeting (tonight!) we vote for the quilt that will be representing our guild at the 2023 CQA quilt show. Don’t forget to bring your quilt to the meeting if you want to participate in this year’s CQA challenge. Good luck to all participants!

Monday 27 March 2023

March BOM: Hashtag

For the celebration of spring, we'll be doing the hashtag block in purples and yellows (to represent crocuses and daffodils)!
This is a block where the tutorial can be found HERE.

This is an example of a block made in PURPLES and YELLOWS. 

Please bring your blocks to the April (in person) meeting for a chance to win them all.