Analytics

Monday 22 November 2021

November BOM: Old Maid's Puzzle

Leslie Stobbart here with the November BOM design. 

The block that we'll be making for our monthly block lotto is a traditional quilt block design I'm calling "Vintage Triangles." I'm sure there's an official name for this block, but I don't know it. (If you do know the name, please share! I'd love to have an actual title for this beauty!) called Old Maid's Puzzle. Thank you to Brenda for finding the correct name for this block!

Our block design is inspired by a photo of a vintage quilt that Annabel Wrigley (@littlepincushionstudio) posted on Instagram on August 2, 2021. Remember when she came and did a workshop in person for our guild in January 2020? Remember in-person workshops?? 😭😭😭 

She bought this quilt at an antique mall for $25, which is an excellent deal! What a lucky quilt.

I saw this photo on Instagram and immediately saved it in my "BOM Ideas" folder. So today's the day we get to make it!

Colour Choices:

Maker's choice! 

Blocks can be made with any two fabrics of your choice, as long as there's some contrast between the two. Solids, prints, linens, voiles, whatever your heart desires! I think this pattern is going to look great with a mix.


Cutting and Construction:

All seam allowances are 1/4" for this pattern

Completed blocks will measure 14" (unfinished)

For each block you'll need to have:

  • 6 HSTs (half-square triangles) that measure 5" x 5" made from both fabrics
  • 3 squares cut to 5" x 5" from the lighter (in colour, not weight) of the 2 fabrics  

You can refer to an HST tutorial to help you make multiple half-square triangles in one go. I really like the two-at-a-time HST method, personally. I found a great tutorial blog post from Blossom Heart Quilts if you want to refresh/learn this technique. 

The finished size for these HSTs will be 4.5", so if you're doing the two-at-a-time method, and you want to end up with minimal trimming once you cut the two HSTs apart, you would start with one square of each fabric cut to 5 3/8". If less than a 1/4" measurement makes you sweaty, you can always cut your two starting squares to be 5 1/2" and then trim the HSTs down to 5" once you've done the sewn the two seams and cut the two units apart. You're your own boss!

So, after you’ve got your solid blocks and HST units cut and sewn, arrange them as below:


Now sew the nine pieces together like a nine-patch. I like to sew the three rows together into top, middle, and bottom strips, and then sew those three strips together to make the finished block. But you could also go left/middle/right, if that's more to your liking.


HOT TIP: 
Nest your seams! This block is a good opportunity to practice this technique if you're not familiar. Here's how I nest: 

Once you've sewn your three rows, press the seams for your top and bottom rows OUT (towards the outer edges of the strip), and then press the seams for your middle strip IN (towards the centre of the strip). 

When you go to sew the three strips together, the seams should sit right up against each other really beautifully and create really clean triangle points. This is called nesting and you'll do a tiny happy dance when you get it right. 

However, if you miss the nesting, it's actually *not* a big deal. I find that perfect points feel very important in the moment when you're sewing them, but then they're not actually that important once the quilt top has been made and quilted and washed and it's winged over the back of your couch or your kid has had it on their bed while they're potty training (woopsie!). But perfect points ARE satisfying in the moment and I don't want to deny you that moment of joy, if perfection is your thing.


So there you have it! Vintage Triangles! Old Maid's Puzzles! I think these are going to look so great in a mix of all of our fabrics, and because they're a fairly large block, we may get enough entries to allow for two draws in January.
Thanks as always for participating in this activity. I'm looking forward to seeing everyone's blocks at the January 2022(?!) meeting.

Monday 25 October 2021

October BOM: Hexagons


Theresa Cody here. As you know Leslie Stobbart and I are sharing BOM ideas. It's my turn for October so let's get to it!

I have had the book Hexagons Made Easy by Jen Eskridge for years and although I had the best of intentions to make a hexagon quilt, it hasn't happened. I am sure a good majority of you can relate. So now I finally get to make a hexagon block and now you can too. I have modified the instructions slightly.

Some of you are familiar with English Paper Piecing (EPP) which is one method of making hexies. I missed the EPP workshop that our Guild held when I was at Quiltcon in Nashille in 2019. The method we will be using today to make hexagons is machine faced hexies that are machine appliquéd to a background block.

Finished Block Size: 10 inches

Supplies for the Templates:

Print 3in template  or  Hexie Templates Various Sizes

7in template

If you do not wish to print templates or do not have a printer available to you, you can draw your own hexagon. I am a word person myself and avoid anything mathematical if I possibly can. But if you want to give it a go, here is just one method using a compass and a ruler: How to draw a hexagon  I think even I could manage that

  • Cardboard (a cereal box works well) or a flexible cutting board from the Dollar Store for the templates
  • Glue stick and scissors
  • Rotary cutter
  • Ruler
  • Pencil or marker


Fabric for the Background: A 10.5 inch square of low volume fabric

Fabric for the hexies:

Note: I used squares of fabric simply because I had some available. You can use odd shaped pieces of fabric instead as long as the hexie shape fits with about 1/2 inch to spare around the perimeter of the hexie

For the 3 inch hexagon: A 4 inch square of focus fabric. I used a 5 inch square of focus fabric for the 3 inch hexagon simply because I had some charm squares on hand. The focus fabric for each hexie can be a solid or a print or a combination of prints and solids depending on your design choice

For the Facing: A 4 inch square, preferably in a similar colour to the focus fabric so that the facing will be inconspicuous when it is appliquéd to the background block. I happened to have 6 inch squares on hand so that is what I used for the facing for the 3 inch hexies

For the 7 inch hexagon: An 8 inch square of focus fabric

For the Facing: An 8 inch square for the facing, ideally in a similar colour to the focus fabric

You can choose to make only 3 inch hexagons or you can appliqué a 7 inch and one or more 3 inch hexagons to the background block. You do not necessarily have to stick to these suggested sizes as there are multiple sized templates available for printing. So by all means make whatever size hexies you like that will fit on the 10 inch background fabric bearing in mind that you should have enough space around the 10 inch background block to allow for 1/4 inch seam allowances when the finished blocks are sewn together

Focus and Facing Fabrics


Method:

1.  Glue the paper template to the cardboard and cut out the hexagon shape. Mark the size on the hexie template. If you are using a flexible template, simply trace the outline of the hexie directly on the flex template and cut on the marked line. Mark the size of the hexie directly on the flex template

2.  Trace the hexie shape on to the WRONG side of the FACING fabric

Optional: Cut out the shape 1/2 inch away from the marked line on the facing fabric. DO NOT cut on the marked line or your hexie will be too small. The seam allowance will be trimmed once stitched. I did not do this. I simply positioned all of the facing fabric on the focus fabric square because if I can possibly skip a step, I undoubtedly will

Trace hexie shape on WRONG side of FACING fabric

3.  Pin the facing fabric, right sides together, to the focus fabric and stitch completely around the marked line using a small to medium stitch length

Pin and stitch around the entire hexie

4.  With rotary cutter and ruler, trim 1/4 inch around the stitched line. Trim the FACING fabric about 1/8 inch less than the focus fabric. This is called grading the seam allowance and will ensure that there will be no lumps or ridges around the perimeter of the hexie. Clip each of the six corners of the hexie to reduce bulk and allow for crisp corners when the hexie is turned right side out

Trim and clip points

5.  Snip open the facing side of the hexie, enough to allow room for turning. Try not to make the opening too large. I snipped about 1.5 inches for the 3 inch hexie and about 3 inches for the 7 inch hexie

Cut opening on FACING for turning

6.  Turn the hexagon right side out pushing at the points to make a crisp shape

7.  Press

8.  Arrange the hexies on the background fabric in a configuration that is pleasing to you. You can arrange them diagonally or horizontally or randomly. Pin and machine stitch as close as possible around the entire edge of the hexie. Alternatively you can hand stitch the hexies to the background block if you have the time and inclination. The yellow utensil in the background is an old Rubbermaid orange peeler that I use to push at the points when turning the hexie. Some people use a tool made specifically for that purpose

Pin and machine stitch

And there you have it. Hexagons. Hexies. I look forward to seeing your finished blocks. Hopefully you are inspired to make your own hexagon quilt. For the sake of consistency, please continue to email Leslie before the next meeting to let her know how many blocks you made so that your name can be entered in the draw. Remember to post photos of your completed blocks on Instagram using the hashtag #ottmqgBOM

Thursday 14 October 2021

 Quilts in the Park - weather permitting

We would love to see many of you for an in person event.  Check back here by noon on the 16th to see if it has been cancelled due to rain.

Vincent Massey Park, zone QRST (ish)

Saturday Oct 23rd at 1:00 pm (rescheduled from Oct 16th due to rain)

bring: Quilts, a lawn chair, a mask,  a credit card to pay for parking ($1 per half hour)


Monday 27 September 2021

September BOM: PUMPKINS!


Welcome back to another Ottawa Modern Quilt Guild season! 

And it's Block of the Month/Block Lotto time! I'm Leslie Stobbart and I'm back as your Block of the Month coordinator again this year. I'm being joined by Theresa Cody, who has also volunteered to join me this year. I'll be setting the design for the September > October Block, and then Theresa will take reigns for the October > November design. Thank you, Theresa!

I thought I'd start our own OMQG tradition of having the first Block of the year follow a Halloween/Fall theme. Because who doesn't want to have help making their own Fall-themed quilt? Last year we did spooky houses, and this year, it's pumpkins!

I've adapted this tutorial from one I found on Craftsy. I made the dimensions slightly larger than the Craftsy instructions, and also expanded the instructions to allow for a single-fabric pumpkin, a stripey pumpkin, or a patchwork pumpkin. I think a mix of all three designs in one quilt will look very cool!

Colours:

For the pumpkins, you can go with standard orange fabric, or you can mix it up with white fabric. Solids or prints, whatever speaks to you!

For the background, let's stick with black(ish) fabric choices. Feel free to choose either solids or prints for these, too.

You'll also need a bit of brown fabric for the stem, and green fabric for the leaf on each pumpkin.


Cutting Instructions:

For a Single-Fabric Pumpkin:

- 1 square of pumpkin fabric, cut to 6.5" x 6.5"

- 1 brown 1.5" x 1.5" square (this will be the stem of the pumpkin)

- 1 green strip, cut to 1.5" x 3" (this will be the leaf)


For a Stripey Pumpkin:

- 3 pumpkin strips cut to 2.5" x 6.5"

- 1 brown 1.5" x 1.5" square (this will be the stem of the pumpkin)

- 1 green strip, cut to 1.5" x 3" (this will be the leaf)


For a Patchwork Pumpkin:

- 9 squares of pumpkin fabric cut to 2.5" x 2.5"

- 1 brown 1.5" x 1.5" square (this will be the stem of the pumpkin)

- 1 green strip, cut to 1.5" x 3" (this will be the leaf)


Background Fabric: 

These pieces are the same for all three variations.

- 2 strips cut to 1.5" x 7.5"

- 2 strips cut to 1.5" x 8.5" 

- 1 strip cut to 1.5" x 3" 

- 6 squares, cut to 1.5" x 1.5"


Block Construction:

NOTE: 
Completed blocks will measure 8.5" x 9.5", and all seam allowances are 1/4".

1. Sew either the pumpkin strips together, or the patchwork squares together into a nine-patch, as shown in the photo below. If you are making a single-fabric/non-scrappy pumpkin, you get to skip this step.

2. Mark and sew the corners. Place a background square on each corner of the 6.5" pumpkin piece, right sides together. To shape the pumpkin, mark each square with a diagonal line from corner to corner. Sew on these lines.


3. Trim the corners. Using a ruler and rotary cutter, trim the corners ¼” from the sewn line. Press the corners away from the pumpkin fabric.


4. Make the leaf. Place the remaining two background squares on top of the green strip. Mark these from corner to corner as well, then sew on the lines, trim and press the corner HSTs out.


5. Sew the stem. To make the top of the block, arrange (from left to right) the 1.5" x 3″ background strip, the brown square and the green leaf unit you just made.

Sew the pieces together, then press both seams in toward the brown square.


6. Attach the stem to the pumpkin. Sew the stem and leaf row to the top of the orange strips. Press the seams away from the pumpkin.


7. Finish the block. Sew the 1.5” x 7.5" background strips on either side of the pumpkin block. Press the seams toward the border strips.


Sew the 1.5" x 8.5" background strips to the top and bottom of the pumpkin block. Press the seams toward the background strips to finish the block.


Very excited to see the collective pumpkin patch we'll all make for the lucky winner of the Block of the Month draw at the October meeting!


Monday 31 May 2021

May BOM: Wonky Stars

This month's block of the month is a 12.5" wonky star block. This is a fairly simple 9-patch composition that looks pretty great in a finished quilt, if I do say so myself. 

I made 12 of these blocks earlier in the month to bump my Roosting Round Robin quilt top (was that from 2019? More like 1919! Yeesh!) from a throw size to a twin size. The quilt top needed to be 24 inches longer, so a row of six of these wonky stars at the top and bottom of the quilt was just the ticket.

So let's get to it!

All seam allowances are 1/4"

Unfinished block size is 12.5" x 12.5" - this will give us 12" x 12" blocks in the finished quilt.

Colour Choices:

The overall concept is to combine any coloured fabric you like (prints or solids, whatever works) with a light/low-volume fabric (such as white, cream, light grey, light prints, light solids, etc.) for each block. Just pick two contrasting fabrics that make you happy and you're all set!

To add a bit of interest, you can choose to use your coloured fabric as the background, with a low-volume star, or to use the coloured fabric for your star and keep the lighter fabric for your background. 

It's up to you! I tried a couple of each combination, and I think a mix of the two options is going to make for a cool effect in a quilt!

Cutting Instructions:

Background Fabric:

    Cut 8 squares @ 4.5" x 4.5"

Star fabric:

    Cut 5 squares @ 4.5" x 4.5"

Sewing Instructions:

This block starts with making the star-points:

Cut 4 of your star squares diagonally from one corner to the other to create 8 half-square triangles. (The fifth star square doesn't get cut in half, as this will be the middle of your star.)

Lay one of the triangles RST on top of one of your background squares, so that the raw edge of the long side goes diagonally across the top right corner of the background square. 

As you can see below, the long edge of the triangle should span from top of the background square to the right side of the square. Ensure as well that the top point of your triangle falls somewhere left of the centre-line of your background square.


Note that the placement of your triangles may take a bit of practice/eye-balling, as you want to ensure that they aren't too wonky; once each triangle is sewn in place, you should be able to press it up and it will completely cover the corner of your background square.

Sew the first star-point triangle onto four of your background blocks.


Trim the seam allowance of the background corner and then press each point out.


Then repeat this same step for the top left corner of each of these squares.


Your four star-point pieces should now look like this (or thereabouts - it's supposed to look a bit off!): 

Use a ruler and the bottom corners of your background block as a guide and square up each piece to be 4.5" x 4.5".


With all four star-points blocks complete, you're ready to assemble the 9-patch into your star. 

Arrange all nine squares as shown below and sew together. 


Tip: Nesting your seams is going to make it very easy to line up your three rows and achieve a great finish. 

To do this, press the seams of your top and bottom rows away from each other (this is pressing out), and then press the seams of your middle row towards each other (this is pressing in). When you attach the top and bottom row to your middle section, your nested seams should make it quite easy to line everything up and get really nice corners.


Press your finished block and you're done!


Reminder: 

You can make as many or as few blocks as you like for the June Block of the Month draw. The more the merrier!

Just send me an email or post a photo to Instagram with the hashtag #ottmqgBOM before our June meeting, and I'll enter you into our last draw of the year! Have a great month, everyone!

Monday 26 April 2021

April BOM: Modern Appliqué Gumdrops

If you're new to guild's Block of the Month segment, you can read my description of how it all works during the pandemic here!


This month's block idea goes out by special request to guild member Brenda (@quilting.wtmf)! She said, "I hope next month is appliqué" when she shared her Confetti Block from March, and who am I to say no to such a request?

Admittedly, the Confetti Blocks from the March meeting were a bit of a mind-bender (thanks to everyone who went along with it!), so let's slow things down for April with some Modern Appliqué. Plus, I think my "celebration" theme from the March meeting was perhaps pre-emptive, given the state of life in the Ottawa region these days! Sigh. I'll stick to sewing, rather than predicting a swift end to the pandemic from now on, okay? :)

So for this month's BOM idea, I looked again to the Ottawa Public Library's collection of quilting books and came up with Sunday Morning Quilts, which was written in 2012 by Amanda Jean Nyberg (@crazymomquilts) and Cheryl Arkison (@cherylarkison). Amanda Jean and Cheryl are both early pioneers of the modern quilting movement; they each have very inspirational blogs and Instagram accounts, and they're also very prolific, superfans of scrappy quilts. Perfect fit!

The basic idea for this pattern comes from their book, although I've modified their approach a bit. First, I'm expanding the appliqué method to be maker's choice - you can choose any of the following methods: 
  • raw-edge machine appliqué (this makes for some cool frayed texture after a few washes)
  • needle-turn (this is done by hand)
  • freezer paper method
  • ironing on with heat & bond and then zig-zag stitching around the edge (I think that's actually how you're supposed to do raw-edge machine appliqué)
  • maybe a hybrid approach that combines other skills - what about big stitch raw-edge or needle turned appliqué?
So the method is totally up to you! I tried out four styles for this entry (needle-turn, two types of raw edge machine appliqué, and something I made up that I'm going to call big-stitch raw edge appliqué). Please don't feel limited by my examples! I'm not super familiar with appliqué, so this was a learning opportunity for me. Basically, pick a method that works best for you and give this a go!

This pattern is called Gumdrops and appears on p. 122-7 of Sunday Morning Quilts.

Fabric Instructions:

For the gumdrops, you'll need a mix of scraps or smallish pieces (each block requires a colourful scrap of about 5" x 5") in the following colours (solids or prints, whatever works for you):
    • yellow
    • pink
    • red
    • orange
    • purple
For the background: each gumdrop is appliquéd onto a 5" x 5" square of anything white (again, solids or prints, whatever works for you).


Sewing Instructions:

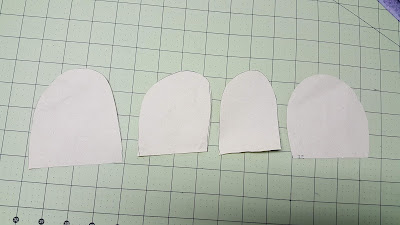
Make a template for your "gumdrop" shapes. I used the book's examples for inspiration and then drew my gumdrop shapes onto the back of a shipping envelope:


I drew each shape freehand, making sure that each one was smaller than 5" x 5". Each one needs to fit onto the 5" x 5" background block, so it can't be bigger, right? Then I cut the templates out.


NOTE: I made four different shapes to give myself some variety, but each participant could definitely just draw one gumdrop shape, since everyone is going to draw a different gumdrop, so this will give us some built-in variety. Team work makes the dream work!

I pinned the paper templates in place on my gumdrop fabrics and used fabric scissors to cut out each shape. For a bit of variety in your gumdrops, you can flip your template over to make the reverse shape.


Then I appliquéd each gumdrop onto a background block. I used a bit of glue to baste each gumdrop in place, and I made sure to align the bottom of the gumdrop with the bottom of each background block.

First, I used a zigzag stitch on my machine for some raw edge appliqué - this was very quick!


Then, I used a straight stitch on my machine and sewed just inside the edge of the gumdrop to leave a little raw edge that will provide texture after it's been washed - also very quick!


Next, I tried my hand (haha!) at needle-turn appliqué - admittedly, not my favourite technique, but I think with some practice I could be convinced.


And finally, just to be wild, I used 8 weight perle cotton thread in a contrasting colour and hand-stitched big X-stitches along the outside edges of two of my gumdrops - this was a really fun technique and I think it looks very cool!


For each block I made, I ran a quick straight stitch 1/8" from the bottom of each gumdrop to hold the bottom edge of the shape in place. I'm not sure if this is actually required, but I figured it would keep things from getting "flappy" and the little basting stitch will be hidden in the seam allowance in the finished quilt, so it can't hurt.


So, this wasn't really an instructive post, per se, but hopefully I gave you some ideas so that you can appliqué a few gumdrops in time for our May meeting! I'm excited to see all the gumdrops that our group will make.

Don't forget to post your photos to social media with the hashtag #ottmqgBOM so we can all follow along with your progress! Happy sewing!

Monday 22 March 2021

March Block of the Month: Confetti Blocks


I don't know about you guys, but I'm starting to feel a bit of hope that there's light at the end of the tunnel? My list of people I know who have been vaccinated is growing, the weather is getting warmer, my garden is starting to emerge from the snow, I may not need to hunt for my kids' winter gear in our closet for much longer... There's a lot to be excited about! 

So let's celebrate with some Confetti Blocks.

I was looking for BOM inspiration this month, and it occurred to me that maybe my friendly Ottawa Public Library would have a book that could help. So I picked up Alissa Haight-Carlton and Kristen Lejneiks's Block Party: The Modern Quilting Bee and came across the Confetti Block. I think we're going to have fun with this one! This block is designed by Megan Risse, and our instructions have been copied directly from the book (p. 92-93).

Fabric Requirements:

Background Fabric: Solid white or white with a small pattern - the background plays a large part in this block, so whatever you use should "read" as white.

Confetti Fabric: Any combination of bright, fun colours: turquoise, pink, purple, peach, yellow, green, blue, red, orange, etc. etc. It's supposed to be like party confetti, so don't be afraid to mix your solids and prints and to go for bold colours. Just get out that scrap bin and let 'er rip!

Instructions:

Completed blocks will measure 13.5" x 13.5" 

All seam allowances are 1/4".

1. Cut the background fabric into strips, varying from 1" to 4" wide and approximately 18" long. Cut the confetti fabric into rectangles of varying sizes, for example, 2" x 3" or 1.5" x 4".

2. Using the background strips, frame each scrap rectangle by adding strips around the centre, like a square in a square. Trim and press as you go.

3. Once all the scraps are bordered in the background fabric, lay them all out. Try to fit the framed scraps together like puzzle pieces. Join sections together by adding additional framed units and background strips if needed to make sections fit together. Square up the units as necessary and press all seams.


4. Continue sewing the units together until you have a block that measures 13.5" x 13.5" square.


And there you have it - party time!!

Please feel free to post your finished blocks on Instagram - the hashtag is #ottmqgBOM if you want to join the party!